


English
GrowHub E25 Manual
SAFETY INFORMATION
Please read the following instructions carefully before using this device. Failure to observe these safety instructions may result in serious injury and will release VIVOSUN of all liability and void all product warranties.
-
Check and comply with your local law and restrictions for additional safety requirements for the installation and operation of the device.
-
Follow the instructions for each smart device and connect the appropriate device to the controller with the appropriate cable
-
DO NOT connect devices that are not explicitly compatible. Please contact our customer service about compatible devices and connection methods for this controller.
-
DO NOT use any grow devices or this controller outside or in any hazardous locations such as spaces with flammable materials, explosive materials, corrosive chemicals, or in wet environments. These devices are designed to operate indoors in an indoor grow tent.
-
Please read and follow the instructions for each device and how to connect it to the controller. Failure to follow the instructions for each of the controlled device may damage them and will void warranty.
-
If your device is damaged, stop using it and contact us immediately. Do not disassemble or modify the devices without VIVOSUN’s direction may cause damage to the device and will void the warranty.
KEY FEATURES
-
FLEXIBLE COMBINATION : Support multiple SGS devices like AeroLight, AeroZesh, AeroWave E and AeroLab, combine by growers freely
-
REALIZE REMOTE CONTROL : Easy to make you monitor and control AeroLight, AeroZesh and AeroWave E by VIVOSUN APP remotely
-
WI-FI & APP CONTROL : Wi-Fi enabled with VIVOSUN App; monitor and control remotely.
-
EASY INSTALLATION : Small size, plug and play control system with lots of flexibility
-
SIMPLE TO USE : One button for Wifi configuration, status indicator & reset, clear and safe green LED to show the status
-
SMART & PROFESSIONAL : Smart auto-mode and professional grow recipe settings take plants from seed to harvest with minimal user input needed.
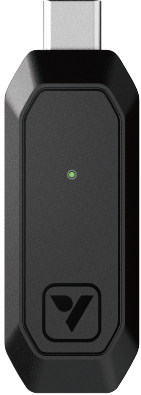
PRODUCT CONTENTS
| Image | Name | Quantity |
|---|---|---|
|
VIVOSUN GrowHub Controller E25 |
1pc |
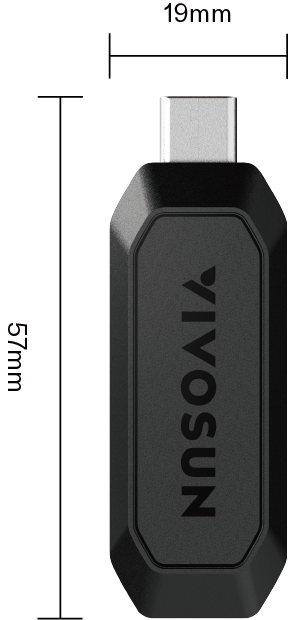
DIMENSIONS
| Top View | Side View | Bottom View |
|---|---|---|
|
|
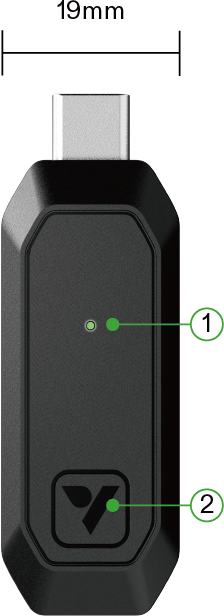
|
① Indicator Light
② Button
INSTALLATION
Status Indicator
Quick press the button. The green LED will flash slowly 3 times to show it is working.
Reset
Long press the button for 3 second until the green LED is on, then release the button. The green LED will turn off and reset success. E25 will restart and enter WiFi configuration.
Firmware Update
The green LED will flash fast during Firmware Update.
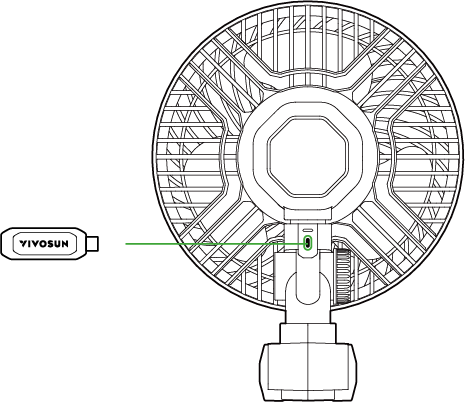
Insert E25 to the Type C port of AeroLight, AeroZesh, AeroWave E or other SGS devices. E25 will enter WiFi configuration
AeroLight |
|
AeroZesh |
|
AeroWave E |
|
LumaRay |
|
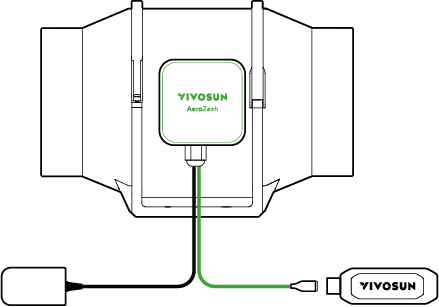
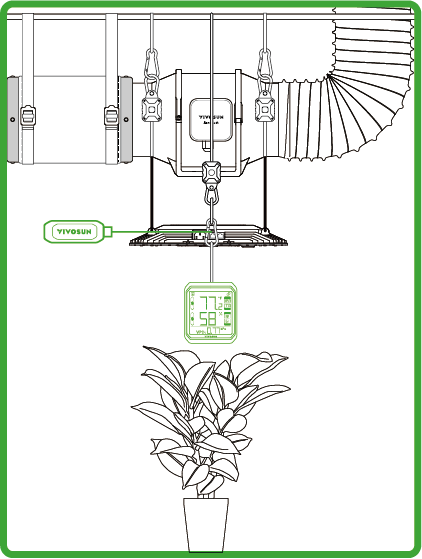
Combo with AerolabTH
Pair AeroLab THB1S as a sensor to GrowHub E25. Then you can get a display and temperature/ humidity sensor for GrowHub E25 and work work with Vivosun AeroLight, AeroZesh and other VIVOSUN SGS device as you need. Just like a GrowHub E42/E42A. Besides, AeroZesh Auto mode can be achieved with AeroLab THB1S and GrowHub E25
Notice: Each device needs one GrowHub E25.
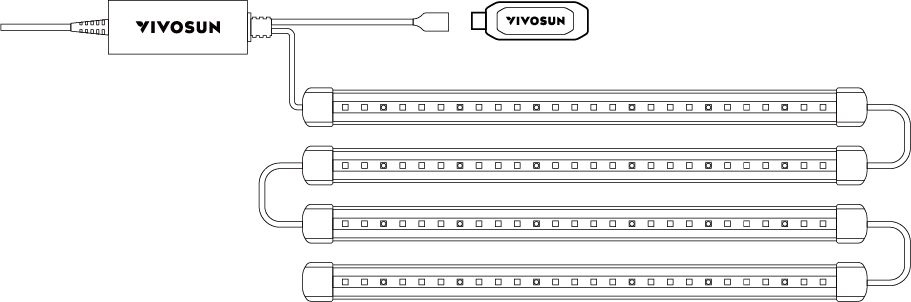
Connection of controller and multiple lights

Connect multiple AeroLights with RJ45 cables, and the first light to a VIVOSUN GrowHub controller E42 or E25 to control all the lights for dimming, spectrum tuning and ON/OFF cycle setting. Each light needs to connect the AC power separately and the GrowHub controller only need to connect to an AeroLight to run. Please see the VIVOSUN GrowHub controller E42 manual for information about light control and more if connected to E42.
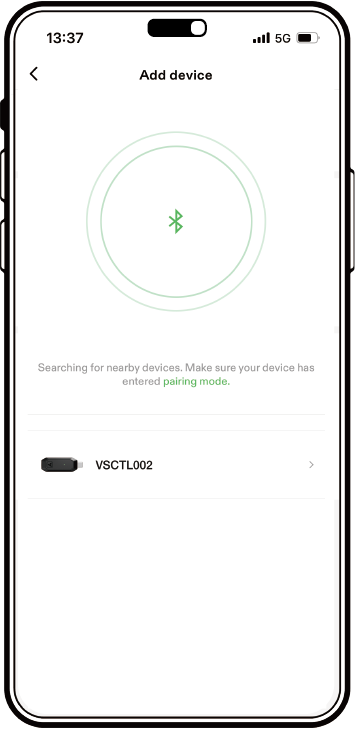
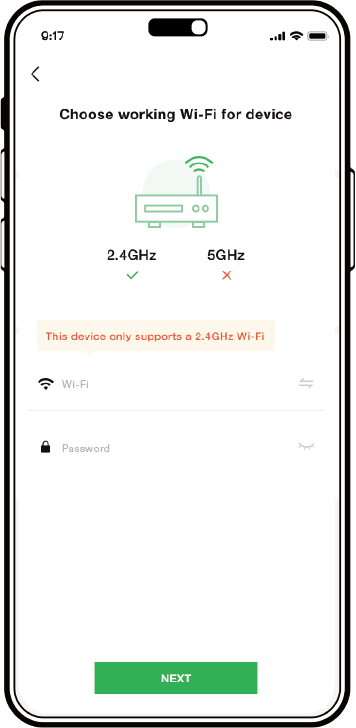
WIFI CONFIGURATION
Search "VIVOSUN" in the Apple App Store or in the Google Play Store to download the VIVOSUN App. With the VIVOSUN App, you can check and control your GrowHub from anywhere in the world—whether you are on your couch, visiting your family, or traveling abroad.
WiFi Configuration
During WiFi configuration, the Green LED will flash fast. Then follow the WiFi configuration process on the Vivosun APP .
Step 1: |
Step 2: |
|
|
Step 3: |
Step 4: |
|
|

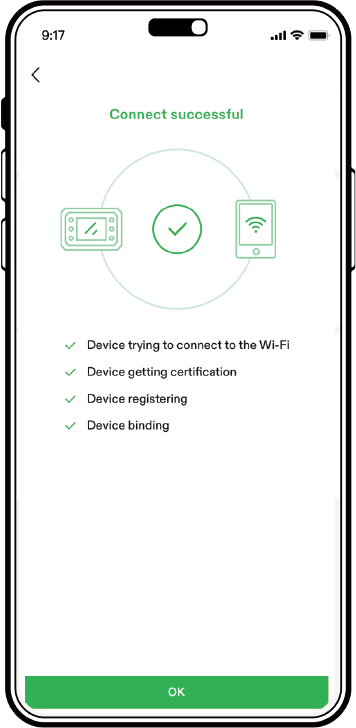
After WiFi configuration success, the green LED stops flashing and goes off.
If E25 is offline (i.e., no Wi-Fi connection or you do not have internet access), the green LED will flash slowly. It will continue flashing until E25 has a Wi-Fi connection again.
After WiFi configuration success, the green LED stops flashing and goes off.
If E25 is offline (i.e., no Wi-Fi connection or you do not have internet access), the green LED will flash slowly. It will continue flashing until E25 has a Wi-Fi connection again.
APP CONTROL
Expansion to GrowHub
E42/E42A
GrowHub E25 can either schedule independently or share the same schedule with GrowHub E42/E42A. You can add E25 and E42/E42A to the same garden on VIVOSUN APP.
GrowHub E25 can work as an expansion port for GrowHub E42/E42A.
-
Remote control the devices with manual or cycling mode.
-
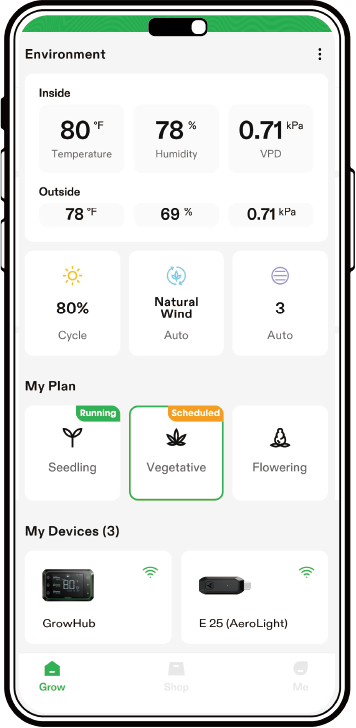
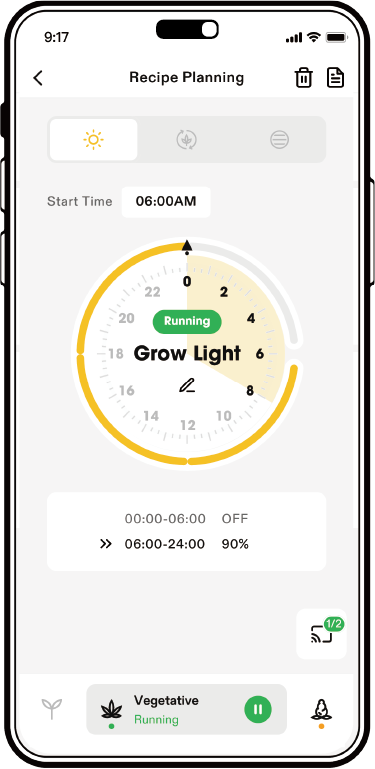
Grow Recipes: Enables you to set your lights, circulation fans, and duct fans based on different growth stages. The recipes provided in the VIVOSUN App are created by professional growers. All you have to do is click "apply" and the your VIVOSUN setup with take care of the rest.
Warranty
VIVOSUN offers a 2-year limited warranty on this product purchased directly from us or our authorized dealers, beginning on the original date of purchase.
This warranty is provided in addition to, and does not affect, your statutory rights under applicable consumer protection laws in the country where the product was purchased.
For the full Warranty Policy, please visit: https://www.vivosun.com/help/warranty-policy
Alternatively, you may contact customer service at support@vivosun.com / +1 888-505-8486.
FCC ID STATEMENT
This device complies with part 15 of the FCC Rules.
Operation is subject to the following two conditions:
(1) This device may not cause harmful interference, and (2) this device must accept any interference received, including interference that may cause undesired operation.
NOTE: This equipment has been tested and found to comply with the limits for a Class B digital device, pursuant to part 15 of the FCC Rules. These limits are designed to provide reasonable protection against harmful interference in a residential installation. This equipment generates, uses and can radiate radio frequency energy and, if not installed and used in accordance with the instructions, may cause harmful interference to radio communications. However, there is no guarantee that interference will not occur in a particular installation. If this equipment does cause harmful interference to radio or television reception, which can be determined by turning the equipment off and on, the user is encouraged to try to correct the interference by one or more of the following measures:
-
Reorient or relocate the receiving antenna.
-
Increase the separation between the equipment and receiver.
-
Connect the equipment into an outlet on a circuit different from that to which the receiver is connected.
-
Consult the dealer or an experienced radio/TV technician for help.
Contents

We help you grow your best green.

We provide the highest quality.

We relentlessly pursue the future.

We make growing more enjoyable.

We support every grower.
Sign up and get 10% off your first order
©2026 Vivosun All Rights Reserved