
English
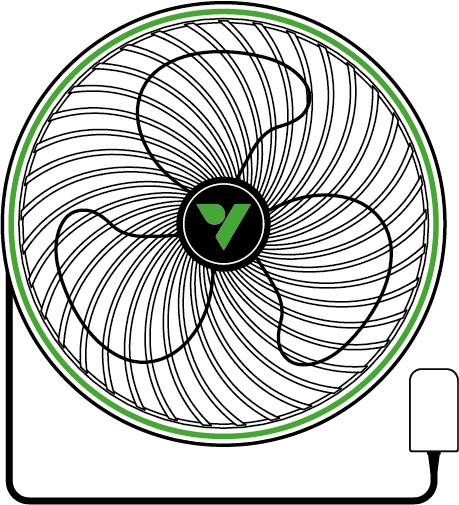
AeroWave E Series Manual
MODEL NAME
-
VSF-AWE6
-
VSF-AWE6W
-
VSF-AWE6-G2
-
VSF-AWE6W-G2
-
VSF-AWE9
-
VSF-AWE9W
KEY FEATURES
-
DUAL BALL BEARING EC MOTOR : Equipped with a highly reliable, efficient, and advanced EC motor.
-
EXTERNAL POWER SUPPLY : The low-voltage external power adapter ensures safe operation while minimizing fan weight and heat generation.
-
PATENTED SQUARE CLIP : Specialized square clip allows this fan to mount to any shape of pole without the risk of slipping.
-
VIVOSUN SGS COMPATIBLE : Compatible with VIVOSUN Smart Grow System for precise, remote, and smart control.
-
PWM SMART CONTROL : PWM tuning enables precise fan speed control at each level and features a natural wind mode.
-
SLIM BASE : Features a minimized base design that is highly efficient and maximizes airflow.
PRODUCT CONTENTS
| Image | Name | Quantity |
|---|---|---|
Fan |
1PC |
|
|
Clip |
1PC |
|
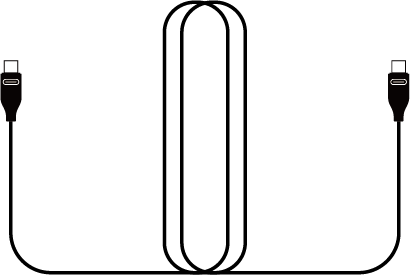
Type-C Extension cable |
1PC |

|
Cable Tie |
3 PCS |
|
Wire Tie |
1 PC |
SPECIFICATIONS
VSF-AWE6 |
VSF-AWE6-G2 |
VSF-AWE9 |
|
Diameter |
6 in. / 152 mm |
6 in. / 152 mm |
9 in. / 228 mm |
Color |
White/Black |
White/Black |
White/Black |
Engine |
EC-motor |
EC-motor |
EC-motor |
Number of Auto Oscillation |
1 |
5 |
1 |
Number of Speed Settings |
5 |
5 |
5 |
Number of Speed Natural Breeze |
1 |
5 |
1 |
Timer |
N |
Y |
N |
Horizontal Oscillation |
90°(±45°) |
90°(±45°) |
80°(±40°) |
Vertical Angle Adjustment Range |
80° |
80° |
80° |
Airflow |
320 CFM |
320 CFM |
580 CFM |
Noise Level |
33 dB(A) |
33 dB(A) |
36 dB(A) |
Power Usage |
12W |
12W |
18W |
Power Drive |
12V/1.0A |
12V/1.0A |
12V/1.5A |
Input |
100-240V AC 50/60Hz |
100-240V AC 50/60Hz |
100-240V AC 50/60Hz |
Waterproof Rating |
IP54 |
IP54 |
IP54 |
Operating Temperature |
32-140°F / 0-60°C |
32-140°F / 0-60°C |
32-140°F / 0-60°C |
Power Cord Length |
100 in. / 254 cm |
100 in. / 254 cm |
100 in. / 254 cm |
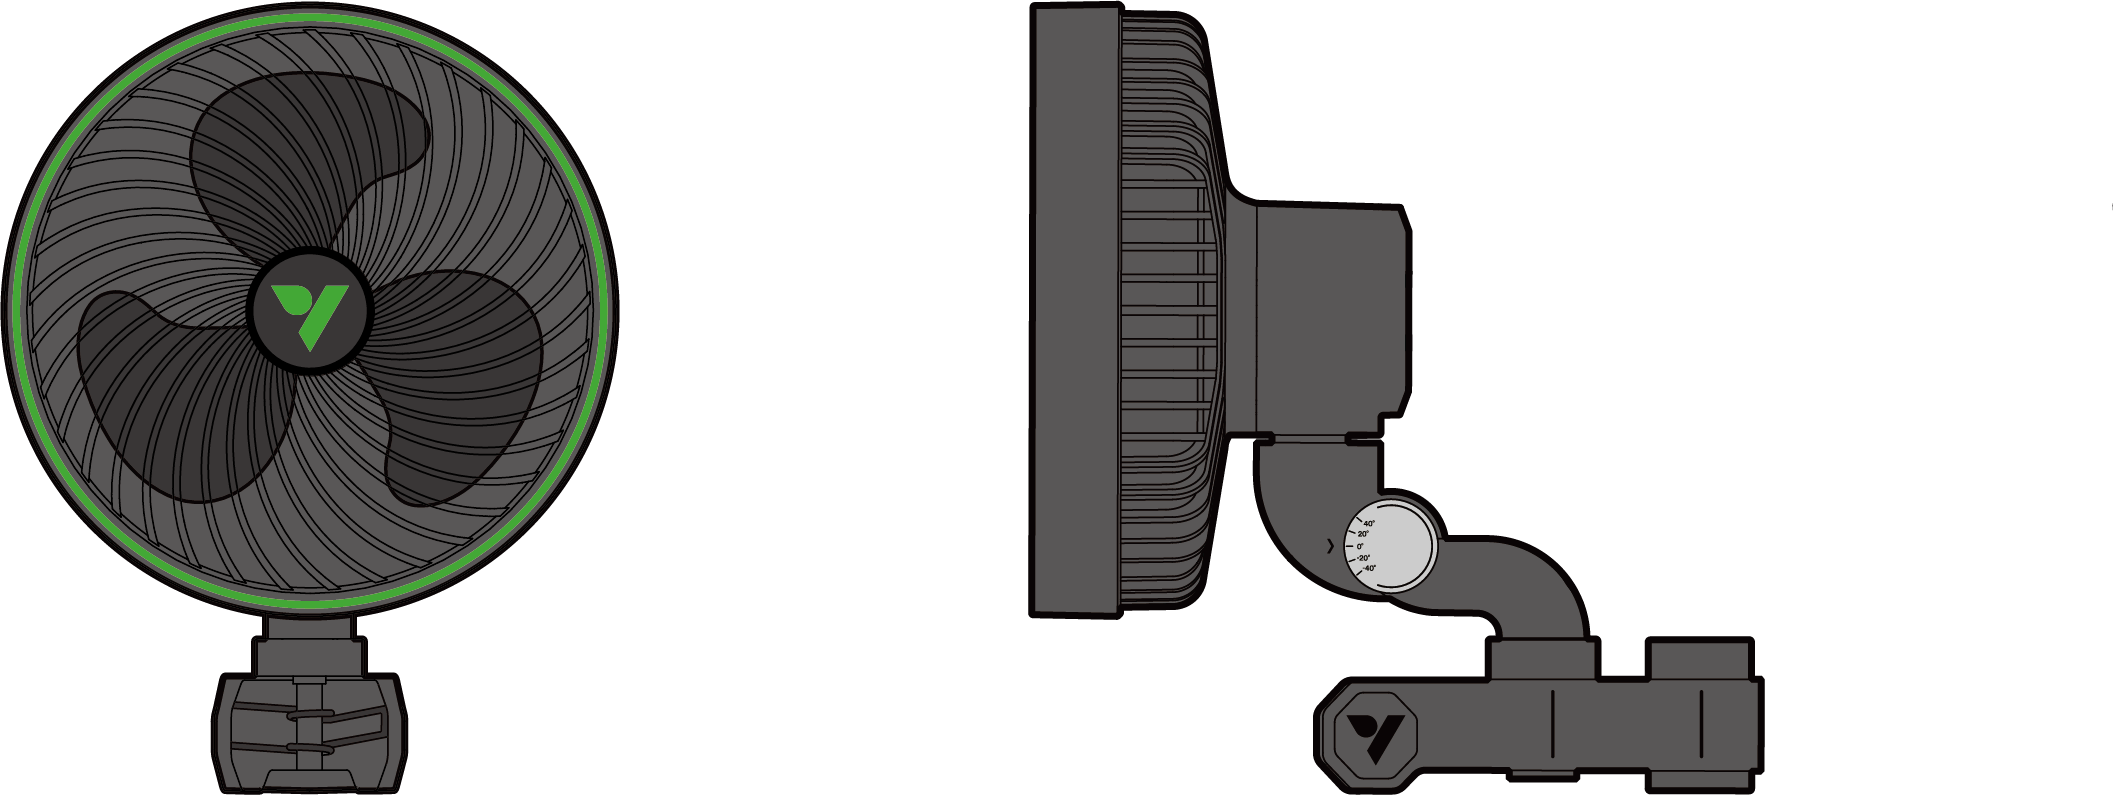
PRODUCT ANATOMY
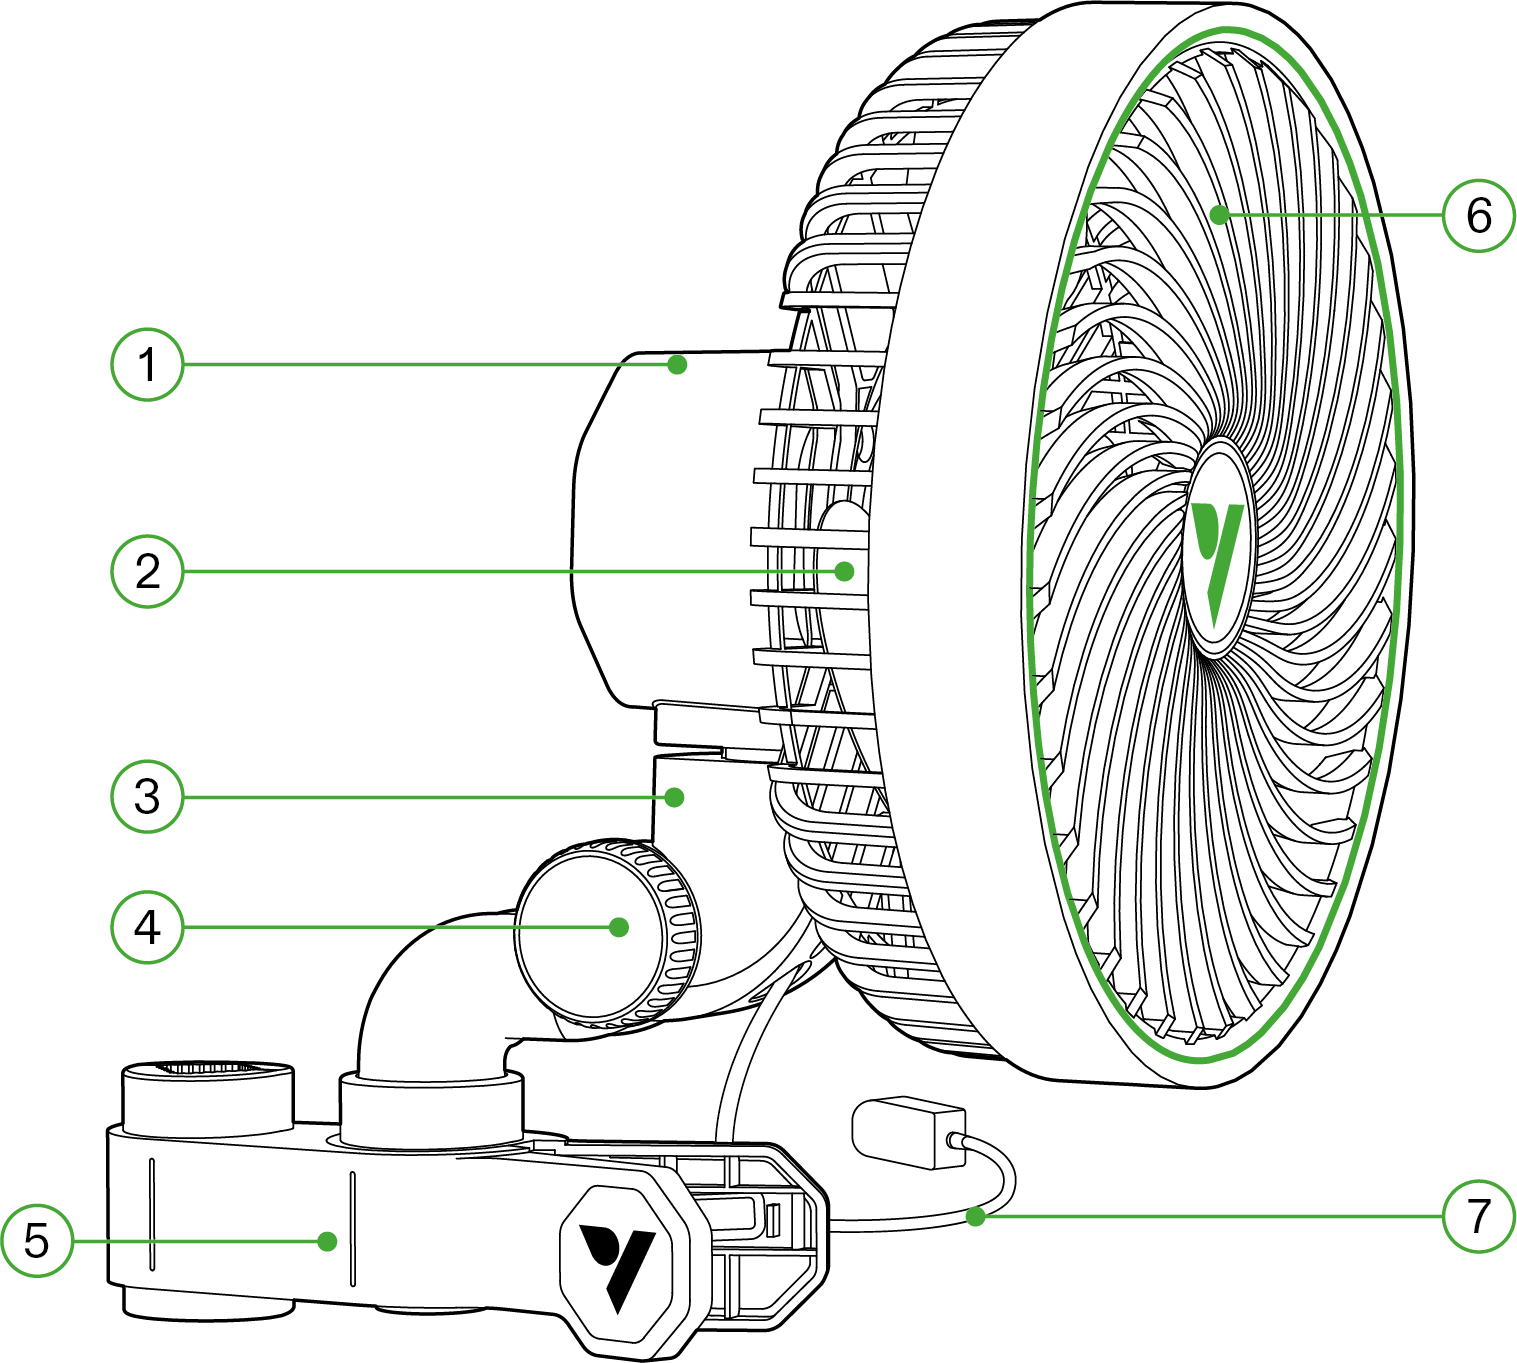
Number |
Description |
Number |
Description |
① |
Control Button |
⑤ |
Retaining Clip |
② |
Fan Blade |
⑥ |
Protective Front Cover |
③ |
Type-C Interface |
⑦ |
Power Adapter |
④ |
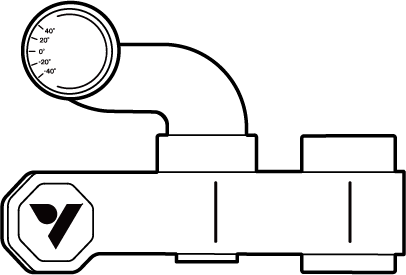
Pitching Knob |
INSTALLATION
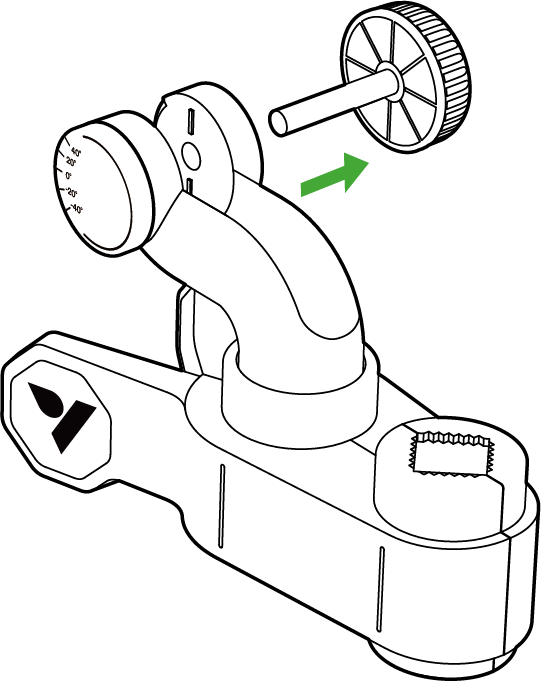
STEP 1
Rotate the knob counter-clockwise until it detaches from the grip clip.
Pull the smaller button piece away from the grip.
STEP 2
Slide the fan’s attachment piece into thebody of the swivel clip. Ensure that the fanis securely attached by opening the swivelclip around the fan.
*Sample Picture- E6 Gen2
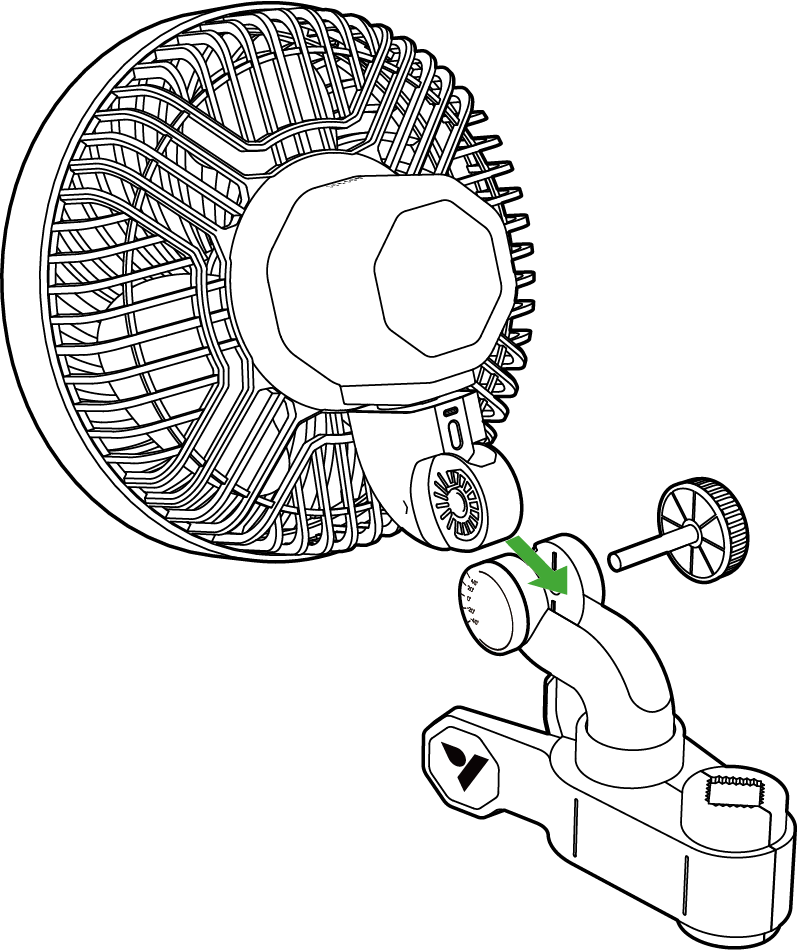
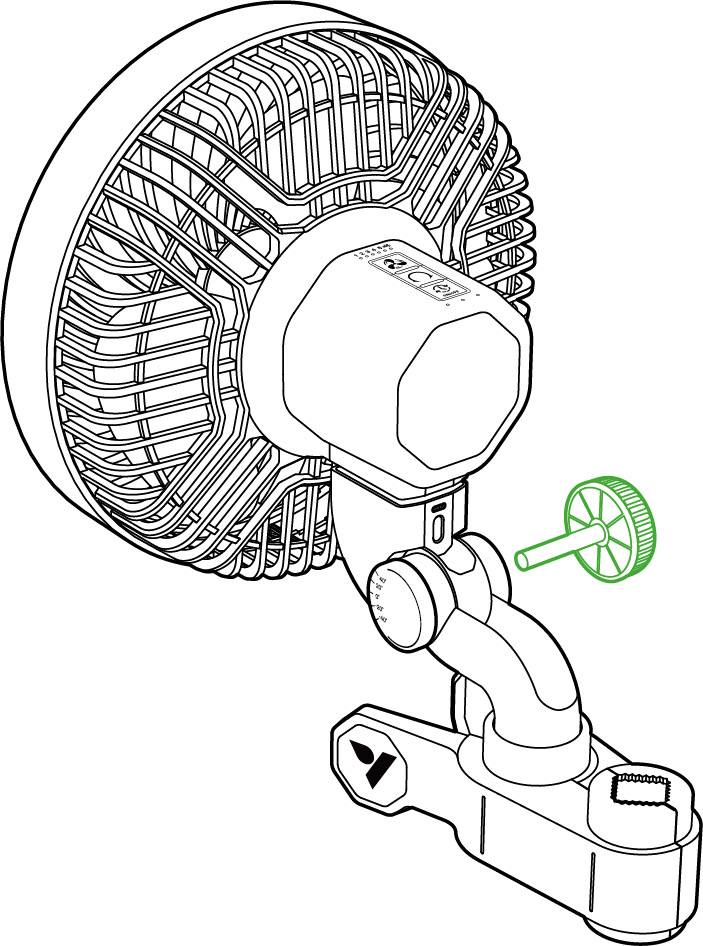
STEP 3
Push the pitching knob through the shaft hole and retighten clockwise.
*Sample Picture- E6 Gen2
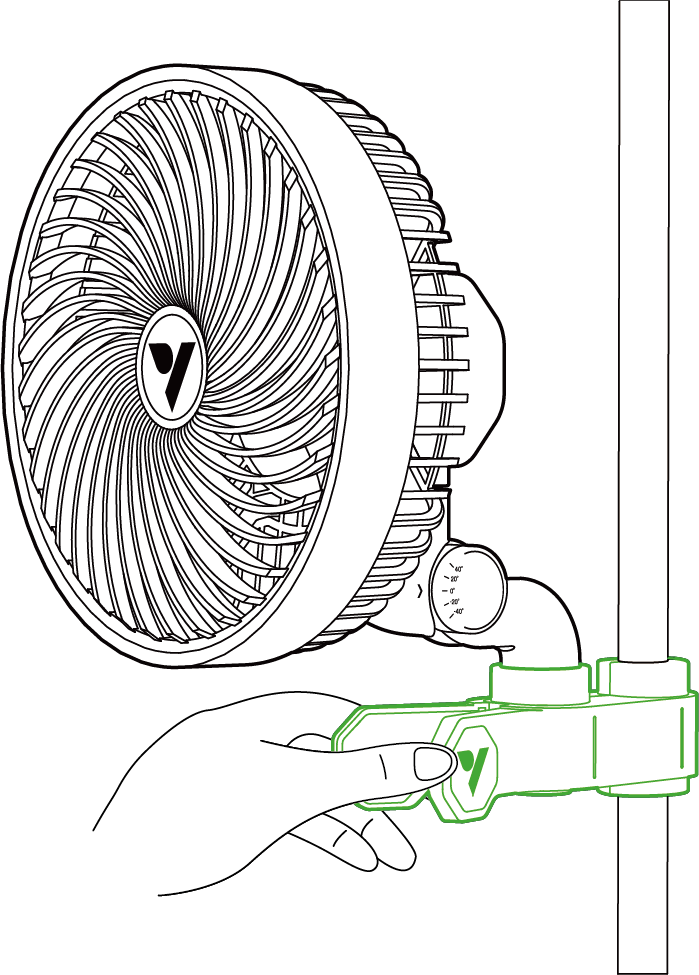
STEP 4
Clip your fan onto your tent pole or another pole and ensure that it is securely attached.
STEP 5
Plug the power adapter into an outlet.
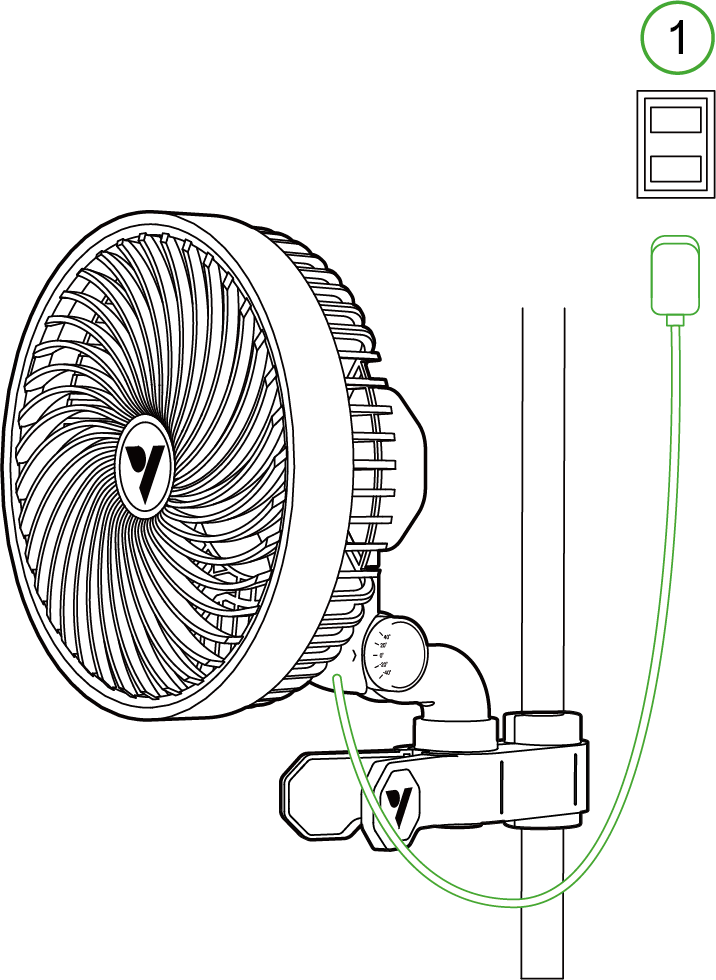
*1. Power Outlet
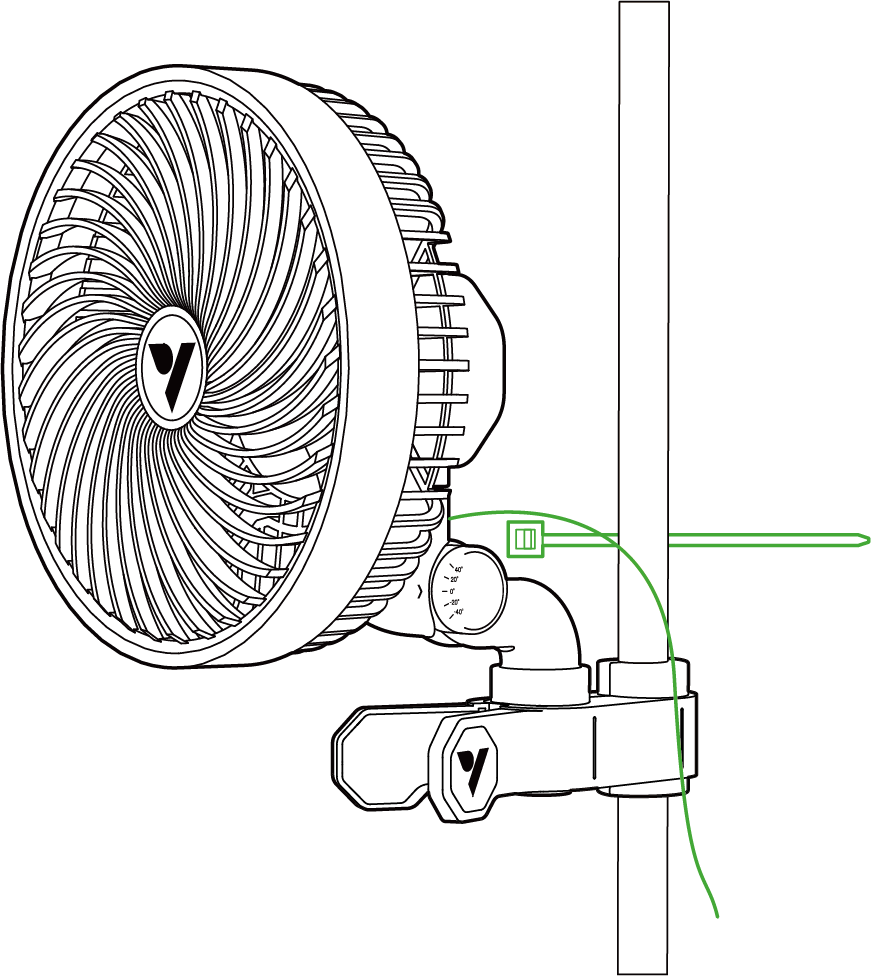
STEP 6
Find a clean and secure surface where you can attach the fan. Once the mounting point is secure, use the included zip tie to bundle the cable and fasten it to the designated location.
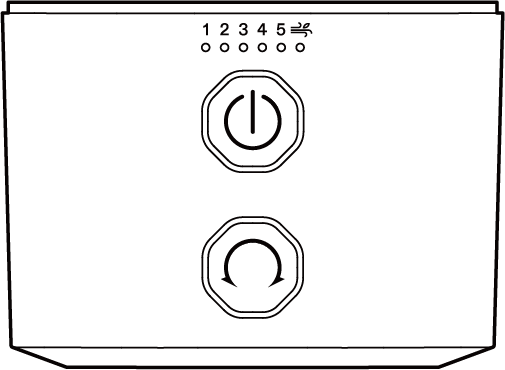
LOCAL OPERATION
E6/E9 GEN 1 SERIES
|
ADJUSTING FAN SPEED - Single press: Turns on the fan and cycles through the speed settings (0-5 levels, Natural Wind mode) - Indicator light: The green indicator light indicates the current speed leve |
|
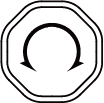
AUTO OSCILLATION - Single press: ON/OFF - Indicator light: The white indicator light indicates gear position |
Auto oscillation can only be activated/deactivated by the swivel button, and cannot be controlled by external controllers or the VIVOSUN app.
Warning: 24-hour oscillation may reduce the lifespan of the clip fan.
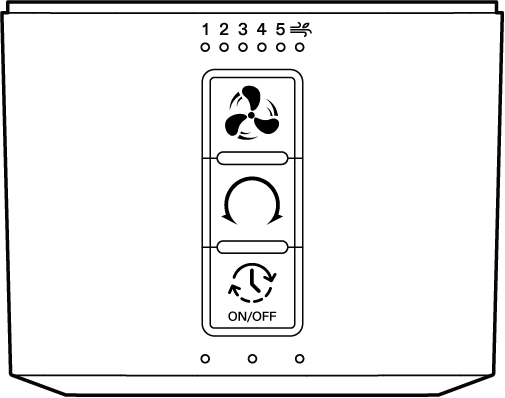
E6 GEN 2- SERIES
|
ADJUSTING FAN SPEED - Single press: Turns on the fan and cycles through the speed settings (0-5 levels) - Long press: Mode switching, switches between normal mode and natural wind mode - Indicator light: The green light shows the current speed setting, and the natural wind indicator light turns on when natural wind mode is activated |
|
AUTO OSCILLATION - Single press: Turns on oscillation, cycles through oscillation levels (0-5 levels) - Indicator light: White indicator light indicates current level |
|
CYCLE ON/OFF ADJUSTING - Single Press: If the device is on, the timer function activates with selectable options. If off, the device turns on - Example of cycle selection - Indicator light: Green indicator light indicates the current timer option - Long Press: Power off and keep the current setting |


Warning: 24-hour oscillation may reduce the lifespan of the clip fan.
CONTROLLER SETUP
GROWHUB CONTROLLER E25
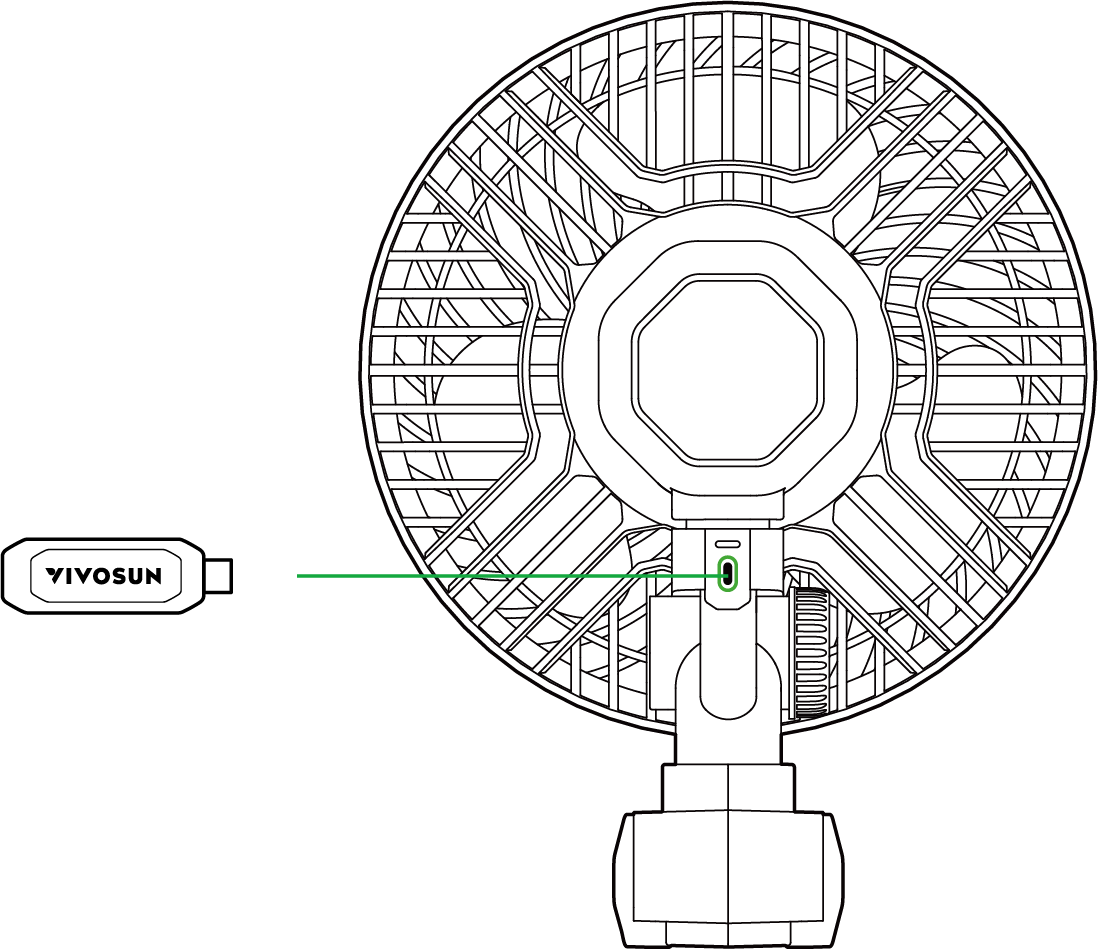
Insert the Cable: Plug the E25 cable into the Type-C port on your AeroWave. The device will automatically enter Wi-Fi configuration mode. During this process, the green LED on the AeroWave will flash rapidly.
Mobile App Setup: Open the VIVOSUN app on your smartphone or tablet and follow the on-screen instructions to complete the Wi-Fi configuration and connect to your AeroWave.
NOTE: To ensure compatibility with AeroWave E6 G2, please update your VIVOSUN app to latest version.
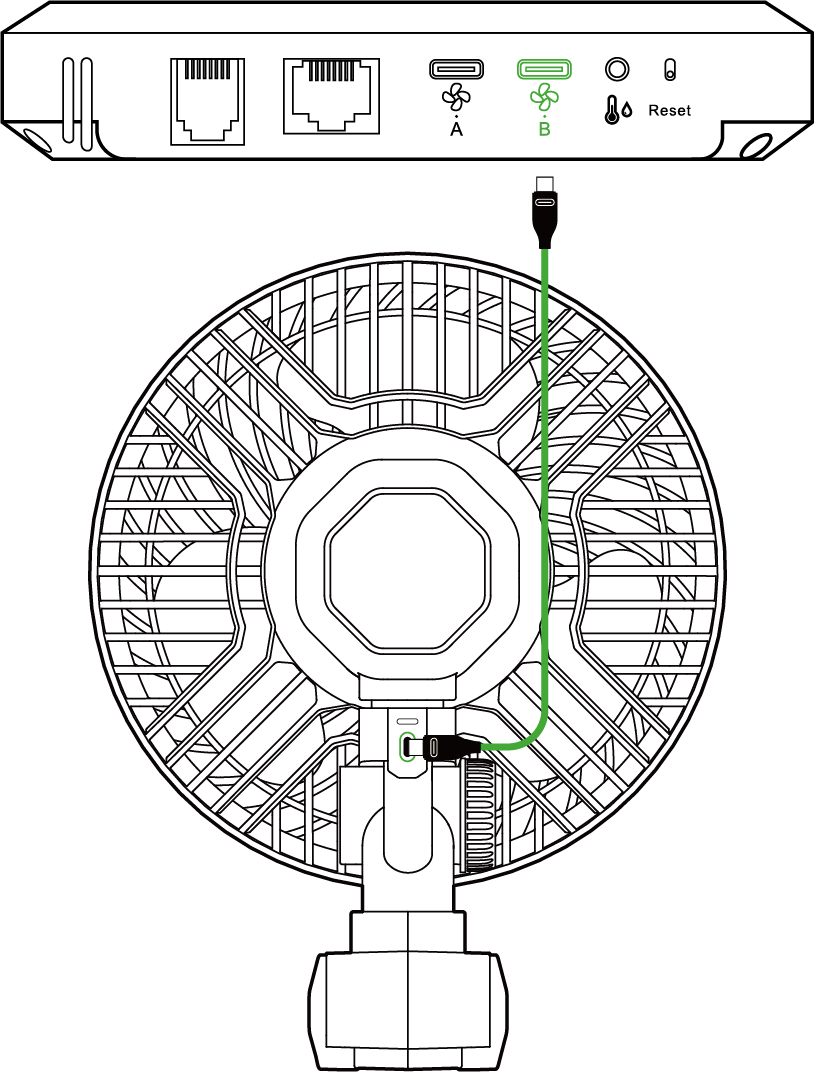
GROWHUB CONTROLLER E42/E42A
Connect the Type-C extension cord into the Type-C port on your AeroWave. Then plug the other end into Port B on the GrowHub E42/E42A controller.
Mobile App Setup: Open the VIVOSUN app on your smartphone or tablet and follow the on-screen instructions to complete the Wi-Fi configuration and connect to your AeroWave.
NOTE: AeroWave E functionality is limited to Port B on the GrowHub controller.
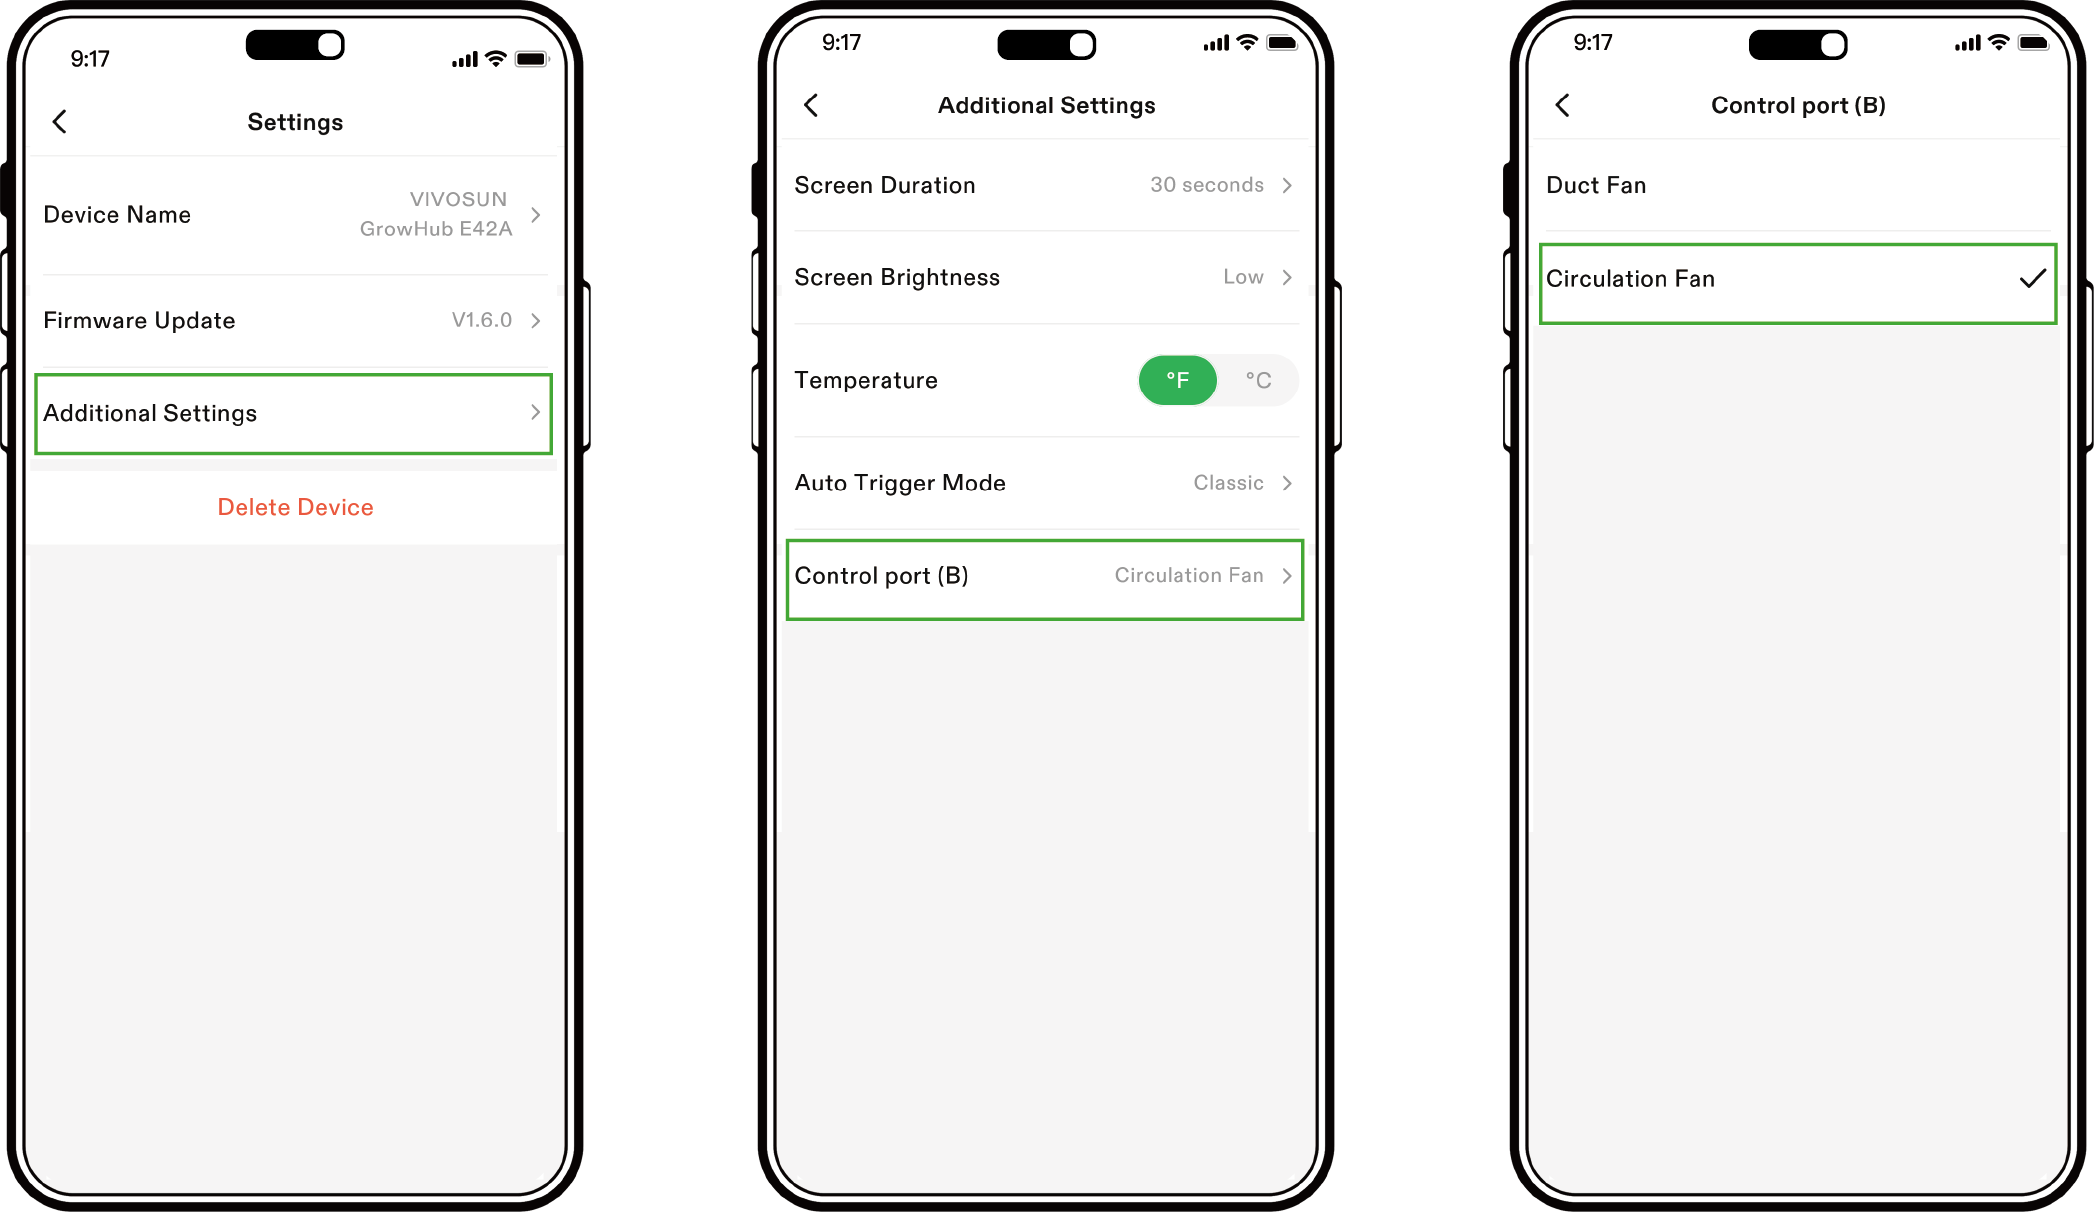
STEP 1
In the VIVOSUN APP, select your GrowHub E42/E42A and enter settings by tapping the top right button.![]()
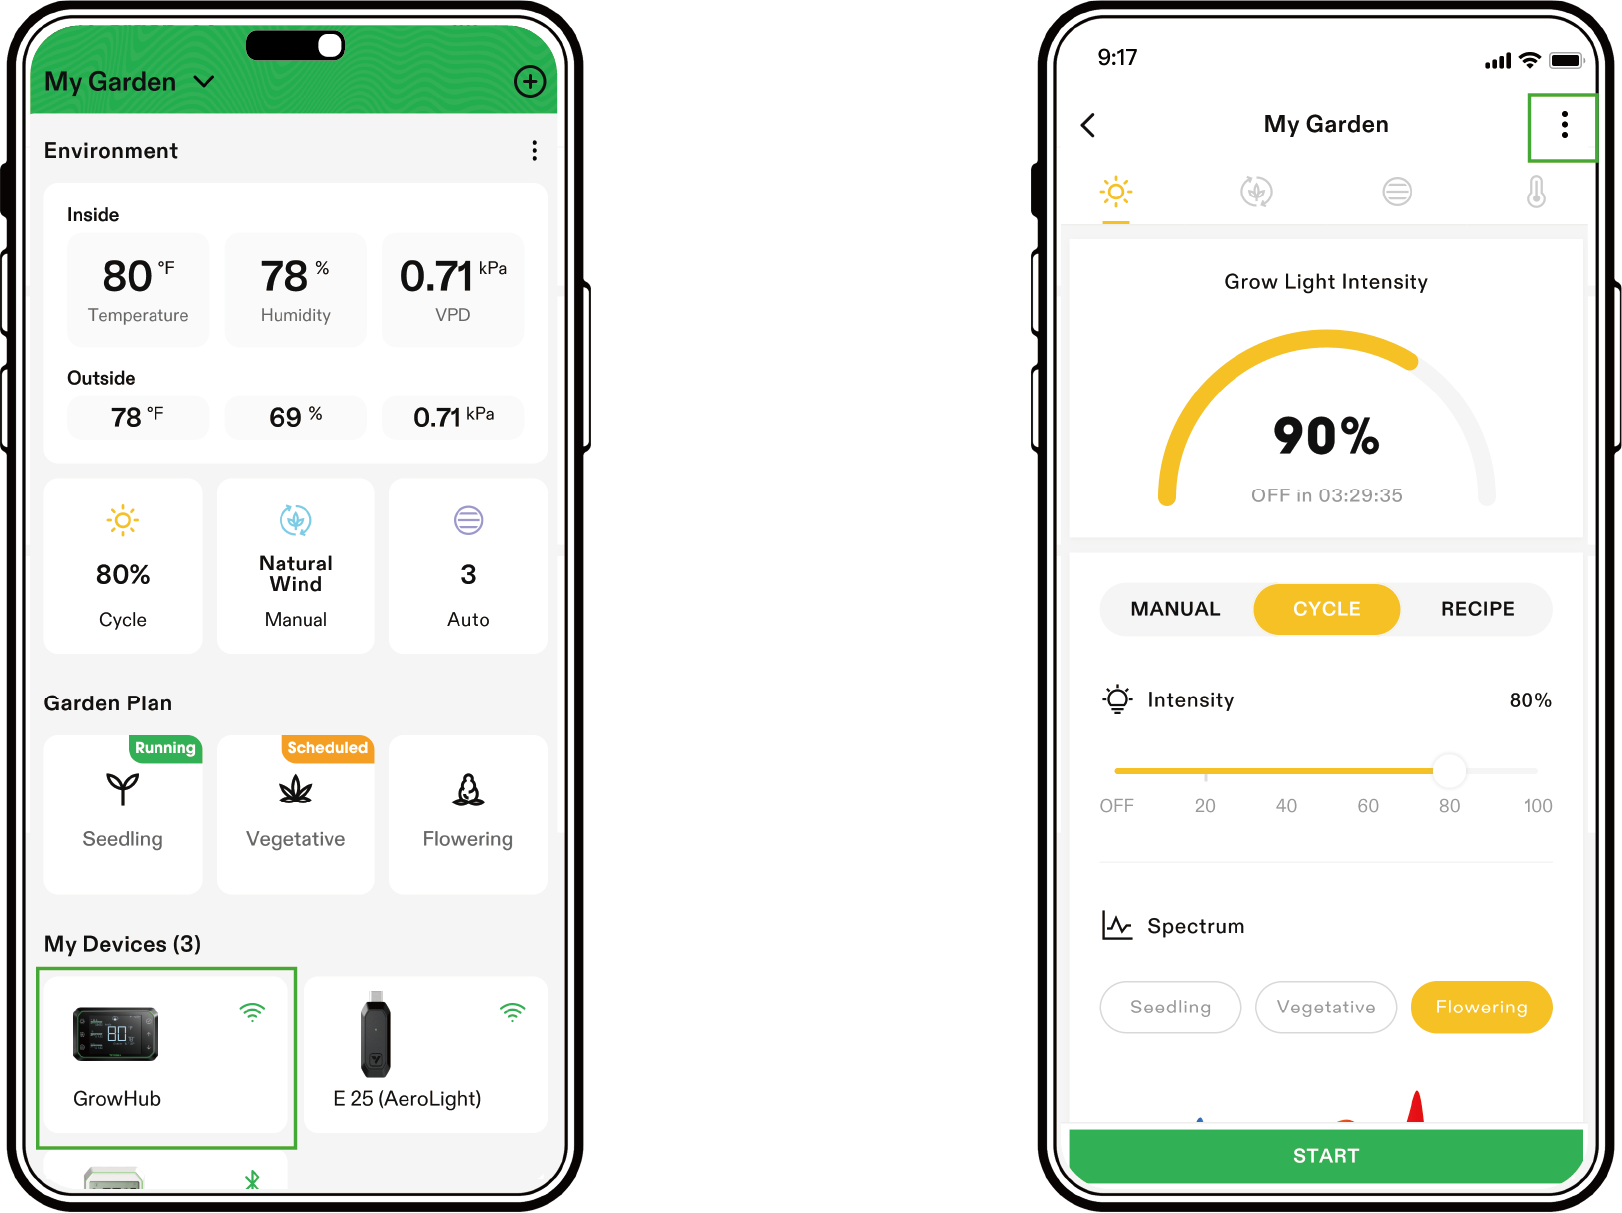
STEP 2
Click "Additional Settings" to view Control Port B settings.Set Control port (B) to Circulation fan. Now you can control AeroWave through GrowHub E42/E42A and the VIVOSUN app.
SET LOCALLY ON E42A
You can also set AeroWave E locally on E42A. Long press ![]() to switch port B to the
to switch port B to the ![]() circulation fan control and the icon will display. Now you can control AeroWave E locally.
circulation fan control and the icon will display. Now you can control AeroWave E locally.
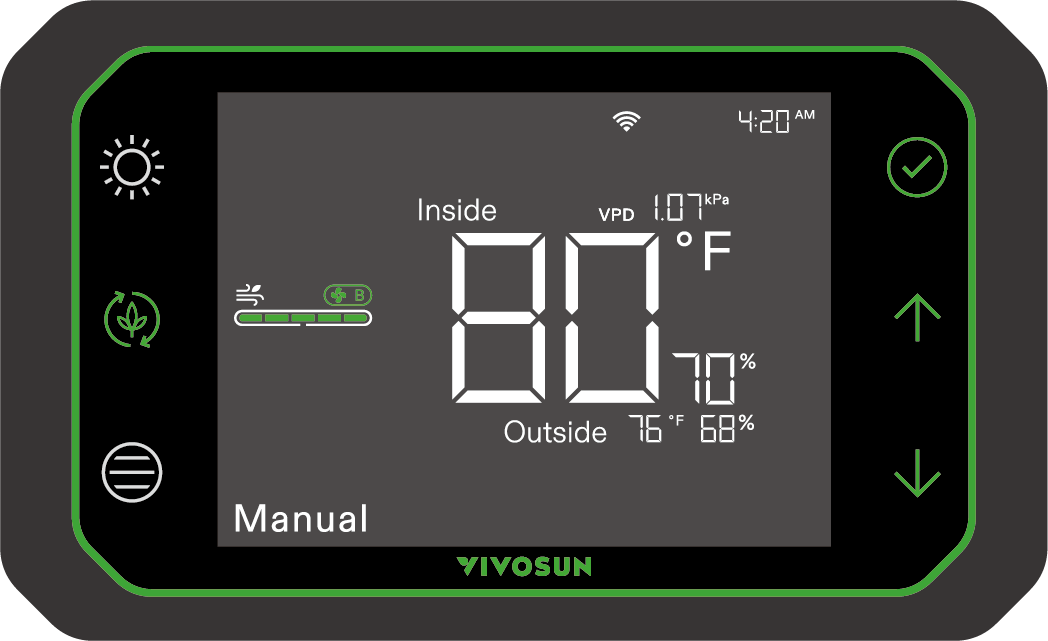
Note: AeroWave fan indicators will turn off after AeroWave is successfully connected to GrowHub controller E25/E42/E42A . Once your AeroWave is connected to the GrowHub controller or the VIVOSUN app, you can control the fan speed through either method:GrowHub Controller: Use the controls on your GrowHub controller to adjust the fan speed.
VIVOSUN App: Open the VIVOSUN app on your smartphone or tablet and adjust the fan speed settings within the app.
E6 Gen2 SERIES
Control |
Fan Speed |
Natural Wind Settings |
Oscillation Settings |
Cycle |
Local |
5 Levels |
5 Levels |
5 Levels |
√ |
E25/APP |
10 Levels |
10 Levels |
5 Levels |
√ |
E42A |
5 Levels |
ON/OFF |
--- |
√ |
MAINTENANCE
Always unplug the power adapter from the outlet before cleaning the fan. Never clean the fan while it is running.

Step 1
Disassemble the fan as follows before you clean the device:
-
Loosen the fastening screws at the bottom of the front cover by turning them counterclockwise with a screwdriver.
-
Rotate the front cover by turning it counterclockwise;
-
Gently pull the front cover off the body
Step 2
Clean any oil, dust, and grime by wiping the blades and parts down with a soft, wet cloth and then wipe it with a dry cloth. Do not use gasoline or other plastic/paint-corrosive solvents. Do not bend or press the device too hard while cleaning, as this could damage the blades.
Step 3
Follow Step 1 in reverse to reassemble the fan.
Warranty
VIVOSUN offers a 2-year limited warranty from the original date of purchase on this product purchased directly from us or our authorized dealers; this warranty and the corresponding expected service life of approximately 8,700–9,000 hours apply when the product is operated under normal and intended conditions, with daily use not exceeding 12 hours.
This warranty is provided in addition to, and does not affect, your statutory rights under applicable consumer protection laws in the country where the product was purchased.
For the full Warranty Policy and to submit a claim, please visit: https://www.vivosun.com/help/warranty-policy
Alternatively, you may contact customer service at support@vivosun.com / +1 888-505-8486.
WARNING
-
The appliance can be used by children aged from 8 years and above and persons with reduced physical, sensory or mental capabilities or lack of experience and knowledge if they have been given supervision or instruction concerning use of the appliance in a safe way and understand the hazardsinvolved.
-
Children shall not play with the appliance.
-
Cleaning and user maintenance shall not be made by children without supervision.
-
Keep the appliance and its cord out of reach of children less than 8 years.
-
After assembly, do not remove the guards during use or cleaning.
-
If the supply cord is damaged, it must be replaced by the manufacturer, its service agent or similarly qualified persons in order to avoid a hazard.
-
Do not put your fingers, pens, or other objects into the front cover while the fan is on.
-
Never touch the plug or outlet if your hands are wet.
-
Don’t place the device in the microwave.
-
Use only the cable that came with the device. Don’t use any third-part USB cables that are not specifically rated for this device .
DO NOT dispose of this product with your regular trash. Electrical appliances contain hazardous materials that can harm the environment if not disposed of properly.
Please contact your local government for information on nearby drop-off centers or recycling programs that accept electronic waste.
Contents

web_footer_support_1

web_footer_support_2

web_footer_support_3

web_footer_support_4

web_footer_support_5
web_subscribe_title
web_common_copyright