What is water curing?
Water curing, a lesser-known technique in cannabis processing, involves submerging dried cannabis buds in water for an extended period to remove impurities and improve overall quality. As a cultivation expert, I’ll delve into the intricacies of water curing, supported by data and practical insights.

1. Process Overview:
Water curing typically involves soaking dried cannabis buds in room temperature water for several days to weeks. During this time, water molecules penetrate the plant material, leaching out water-soluble compounds, including chlorophyll, sugars, and other undesirable substances.
After the initial soaking period, the water is changed regularly to prevent stagnation and maintain cleanliness. Once the curing process is complete, the buds are dried thoroughly before consumption or further processing.
2. Benefits of Water Curing:
Water curing offers several potential benefits, including improved taste, smoother smoke, and increased potency. By removing chlorophyll and other water-soluble compounds, water-cured cannabis tends to have a milder flavor and aroma compared to traditionally cured buds.
Research suggests that water curing may also enhance the psychoactive effects of cannabis by concentrating cannabinoids such as THC and CBD, leading to a more potent and efficient consumption experience.
3. Reduction of Impurities:
Water curing effectively removes impurities from cannabis buds, including residual nutrients, pesticides, mold spores, and microbial contaminants. This purification process can enhance the safety and quality of the final product, particularly for medical cannabis patients and discerning consumers.
Studies have demonstrated that water curing significantly reduces microbial populations on cannabis buds, lowering the risk of mold-related illnesses and other health concerns associated with contaminated cannabis.
4. Considerations and Drawbacks:
While water curing offers numerous benefits, it’s essential to consider potential drawbacks and limitations. Extended immersion in water can lead to loss of water-soluble terpenes and minor cannabinoids, potentially altering the aromatic profile and therapeutic properties of the cured buds.
Additionally, water curing requires careful monitoring to prevent mold growth and ensure thorough drying of the buds post-curing. Improper curing practices can result in off-flavors, compromised potency, and diminished overall quality.
5. Application and Best Practices:
Water curing is best suited for cannabis buds with strong flavors, harsh smoke, or excessive moisture content. Indica-dominant strains and resinous varieties tend to benefit most from water curing due to their rich cannabinoid and terpene profiles.
Best practices for water curing include using clean, filtered water, maintaining proper sanitation, and adhering to recommended soaking times and drying procedures to achieve optimal results.
After your cannabis is harvested, drying and curing are the next important steps to determining flavor and quality. Compared to conventional methods like curing in a mason jar, water curing your cannabis can cure it even faster. Of course, water-curing cannabis also has some disadvantages. read on to learn about the details of this different method.
Comparison of Jar curing and Water curing
| Jar curing | Water curing | |
| Process | Jar curing involves placing buds in sealed glass jars | water curing involves soaking buds in water. |
| Duration | Jar curing can take several weeks to several months. | Water curing usually takes a few days to a week. |
| Result | Jar curing is known for preserving the flavor, aroma, and potency of the buds while also allowing them to develop a smoother smoke. | Water curing is said to produce buds with a milder flavor and smoother smoke compared to jar curing. |
| Benefits | With jar curing, growers have more control over the curing process and can monitor the buds closely for any signs of mold or over-drying. | Water curing is often chosen for its efficiency in removing impurities from the buds quickly. It can be particularly useful for buds that are heavily contaminated with pesticides or other substances. |
What is curing pot?
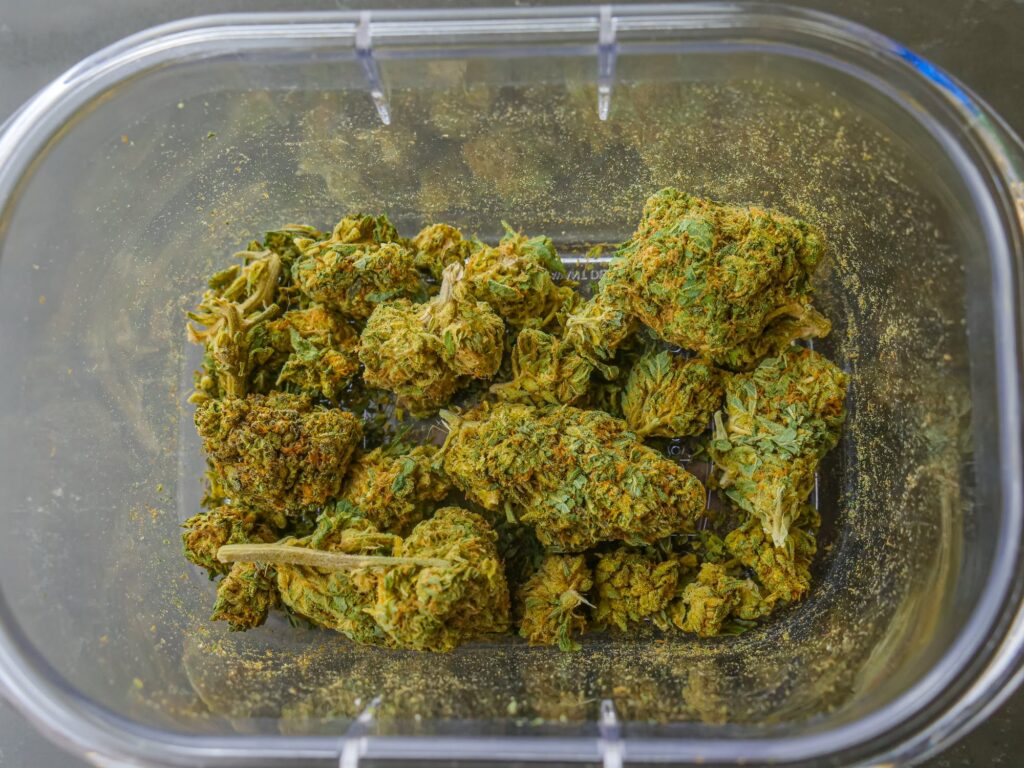
“Curing pot” refers to the process of curing cannabis buds after they have been harvested and dried. Curing is an essential step in the post-harvest process of cannabis cultivation, as it helps to enhance the flavor, aroma, and overall quality of the buds.
The reason why marijuana needs to be cured at all is that doing so removes any irritating substance found in marijuana flowers. Through this process, the chlorophyll and sugars that make marijuana difficult to smoke decompose, thereby improving the smoothness, flavor, and comfort of smoking the plant. Traditional curing usually takes a few weeks while water curing cannabis only takes a few days.
There is a major drawback to water curing, so let’s get that out of the way first. THC and CBD in marijuana are fat-soluble, so soaking cannabis buds in water will not lose remove cannabinoids, and water can accelerate the decomposition of chlorophyll and sugar molecules that are not conducive to smoking.
That said, marijuana also contains water-soluble compounds that may wash off (such as terpenes), so the major drawback to water curing your cannabis is that it might reduce the odor and complexities in the flavor profile. If that’s not something you care about and you just want to cure your cannabis quickly, water curing is a great technique.
Pros of water-curing weed
Removes Impurities: The extended water soaking allows water to penetrate the buds and dissolve/flush out salts, chlorides, nitrates and other inorganic impurities, essentially “cleaning” the buds.
Improves Taste: By removing those salts and impurities, it results in a smoother, cleaner taste when consuming the buds with less harshness and irritation.
Degrades Some Cannabinoid Precursors: The water cure can help degrade some cannabinoid precursors like THC-A and CBD-A into their activated forms THC and CBD, potentially increasing potency.
Enhances Burn Quality: With impurities removed, the buds tend to burn cleaner and smoother without as much harsh smoke or risk of combusting.
Unique Experience: Some find the water-cured buds provide a smoother, more cerebral high compared to a more lethargic body sensation with uncured buds.
Cons of water curing weed
Time and Labor Intensive: The water curing process requires frequently changing out the water every 8-12 hours for 5-7 days. This is very time consuming and labor intensive compared to traditional curing methods.
Potential Terpene Loss: The extended water exposure can potentially cause some loss of terpenes, which are responsible for the aroma, flavor, and some effects of the cannabis. This can impact the smell and taste.
Mold/Bacterial Risk: If not done properly in a sterile environment, the wet conditions create a risk of introducing mold or bacteria growth on the buds.
Potency Reduction: While water curing degrades some cannabinoid precursors to activated forms, it can also degrade THC itself, potentially reducing the overall potency.
Texture Changes: The buds may become overly dry and crispy after the water cure if not properly rehydrated, affecting the smoke/vape experience.
So, how do I water-cure cannabis?
The first step, the pre-step if you will, is to prepare all your equipment: a mason jar, RO water, and mature cannabis flowers.
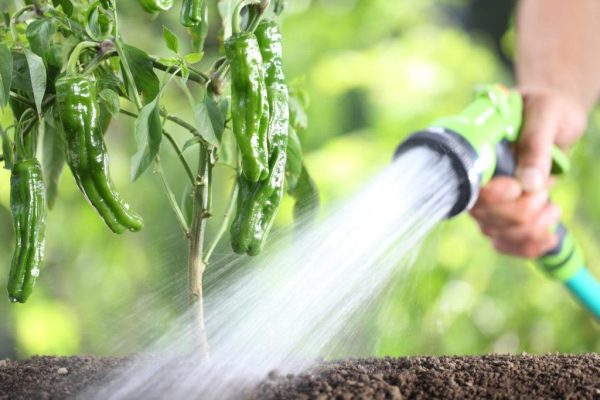
Step 1: After harvest, trim your buds but don’t let them dry out. Remove any stems and fan leaves—save those for butter.
Step 2: Fill the mason jar with clean water and submerge the buds. Ensure that all the buds are well exposed to the water, and if the buds are too light and float you’ll want to try to weigh them down. Seal the jar and make sure that it is airtight. Maintain water temperature between 65-75 degrees Fahrenheit.
Step 3: Shake the jar a little and change the water once a day. You need to change the water because curing occurs when cannabis is exposed to clean water. As well, the water will be full of irritating substances that seep out of the buds so you’ll need to refresh the water on a regular basis. After doing this for 5-7 days, you will notice that the water is clear. When there are almost no impurities in the water, your cure is complete.
Step 4: Hang the cured cannabis to dry to remove the excess moisture.
There is also a “Rapid-Fire Method” that you can do in a day. Place the cannabis flower in a large flat bowl and pour running water over it gently. Do this for about 10 hours and the cannabis is cured. It is not the best technique—you’ll lose a lot of flavor and will potentially damage your buds but it is indeed possible.
Should I use water to cure my weed?
Who should be doing this technique? Like the pros and cons we mentioned earlier, if you like a smooth mouth feel that has little odor using water to cure cannabis might be a decent choice to try out. Or, if you’re in a hurry to cure your cannabis, water curing is a quick way to get it done. We don’t normally go for this method, but we do know it is possible so we thought we would share. We know it is a controversial one and we would suggest that you only go this route if you have a specific set of goals you’re trying to achieve.
Wrap-up
Every step, from seed to harvest, contains small pieces of knowledge and hidden opportunities to change your grow. Sometimes they work, and sometimes they don’t, but it is nonetheless fascinating to see all the opportunities there are when you grow to try new techniques and explore new options.
More Information:
You Should Know What to Do If Your Weed Gets Wet
If you have any questions, please don’t hesitate to reach out to us!
And be sure to check out our other blog posts for useful tips on becoming a great grower!
Subscribe to the Vivosun newsletter for growing tips, grower stories, and special offers, and get 12% off your first order!
We love the new Vivosun Smart Grow System and we are certain that you too will love it once you try it.
And join our Facebook farmer’s community for even more exclusive contests and prizes!
Download Vivosun App to get 15% off and explore more information!