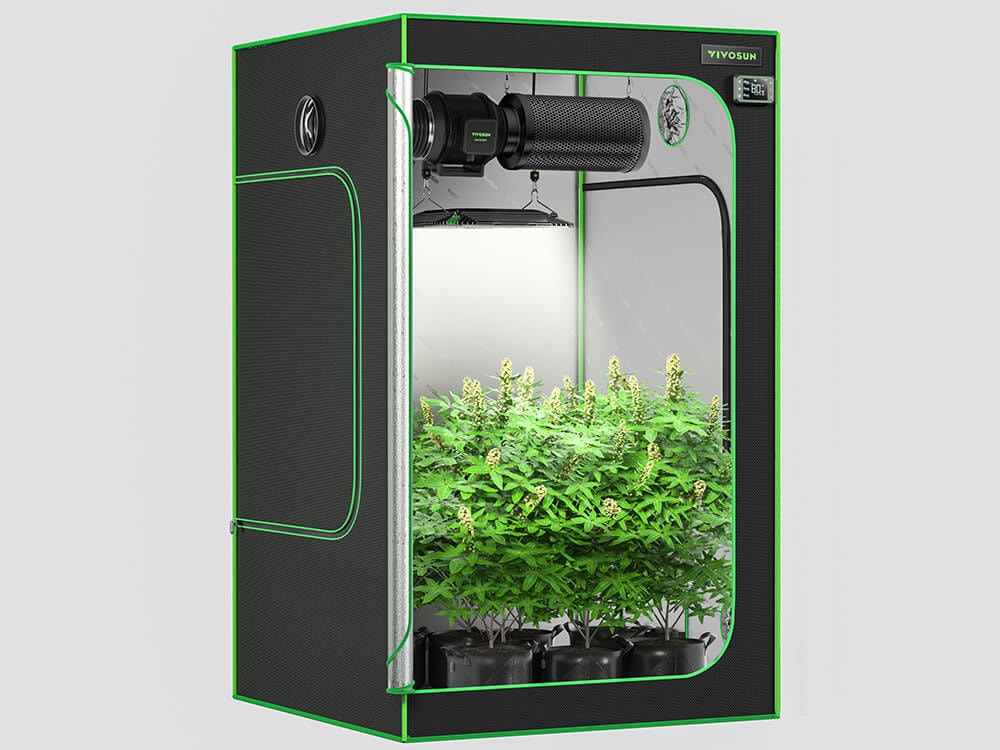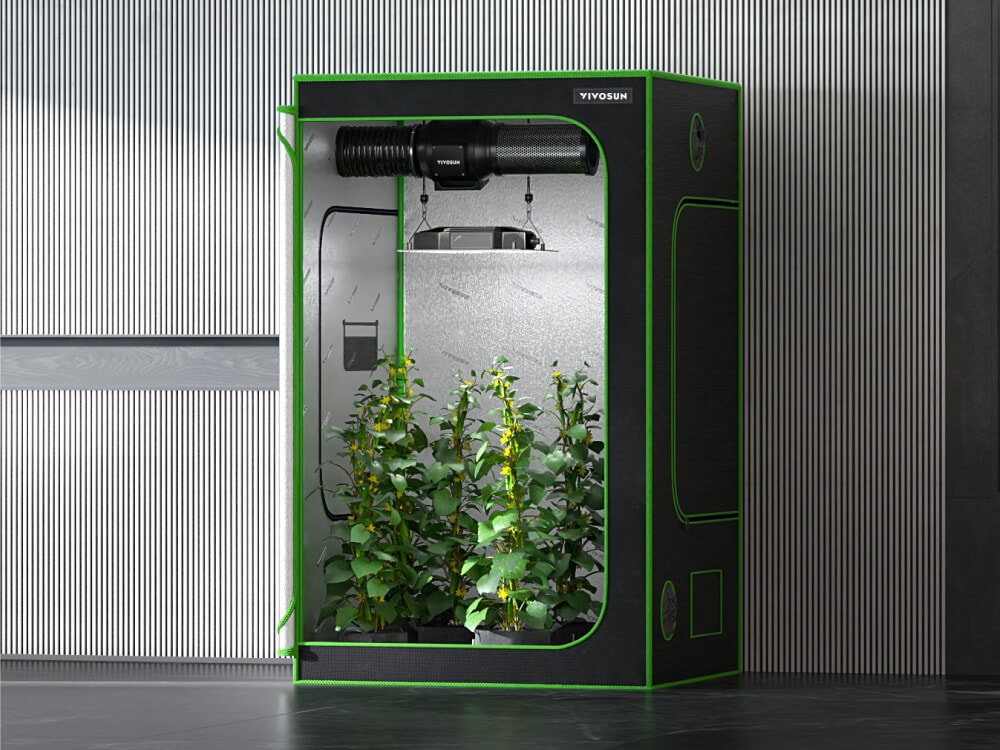
Did you just receive your new grow tent but have no idea how to set up a grow tent? You're in the right place. This guide walks through the full assembly process step by step, from unboxing to zipping up the door — most growers finish in 10 to 20 minutes. By the end, this should be the last grow tent setup guide you'll ever need.
Grow tents give you a fully controlled environment to grow plants indoors, year-round, regardless of the weather outside. Key benefits include:
- Full environmental control — light, humidity, temperature, and pests are all contained and adjustable, so you can fine-tune conditions and get consistent results.
- No seasonal limitations — outdoor growing depends on finding the right spot and surviving winter; a tent removes that dependency entirely.
- Hyper-local growing — grow your own vegetables and plants without the plastic packaging and shipping footprint of store-bought produce.
- Space-efficient — a major advantage for apartment dwellers or anyone without yard access. Indoor growing is rewarding, low-maintenance once set up, and genuinely fun.
Which Grow Tent Size Is Right for You?
VIVOSUN offers several grow tent types — Grow Tent Pro, Standard Grow Tent, Gray Grow Tent, 2-in-1 Grow Tent, and Roof Grow Tent — across a range of sizes. Use our navigational page to browse by size and type.
| Tent Size | Plant Capacity | Best For |
|---|---|---|
| 2x2 | 2–4 plants | Beginners, tight spaces, or as a dedicated "mother tent" for keeping plants in Veg longer |
| 4x4 | 4–6 plants | Most popular size — fits most legal home-grow limits and most rooms, including bedrooms |
| 5x5 | 9–12 plants | Growers ready for more equipment, including hydroponics setups |
| 10x10 | 24–32 plants | Advanced/experienced growers |
Once you've picked a tent size, you'll also need to plan for a grow light, inline fan, carbon filter, and ducting to match — more on that at the end of this guide.
Unboxing Your Grow Tent
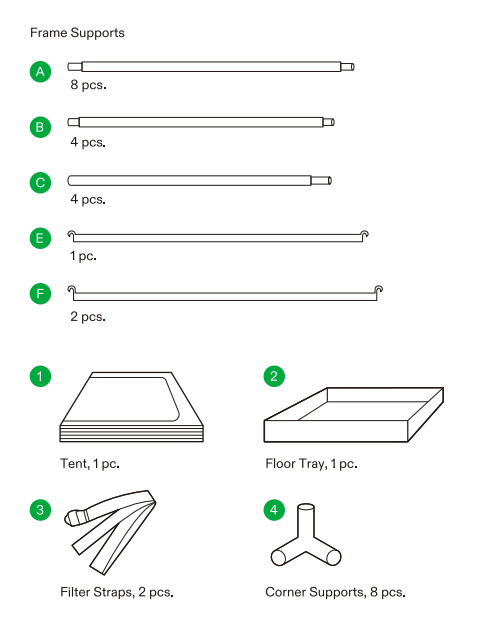
This guide uses the VIVOSUN 4x4 grow tent as the example, but the process is nearly identical across sizes. Inside the box, you should find:
- 19 individual frame pieces
- 1 canvas tent
- 1 floor tray
- 2 filter straps
- 8 corner supports
If any pieces are missing, contact us right away and we'll help sort it out before you start.
How to Set Up a Grow Tent: 10 Steps
It looks like a lot of pieces at first, but the assembly logic is simple once you get going. Prefer a visual walkthrough? Watch our VIVOSUN Grow Tent setup and installation video alongside these steps.
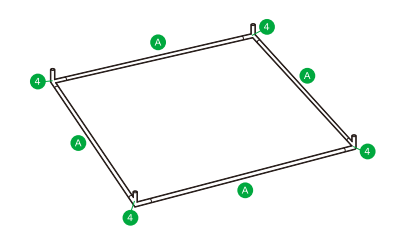
Step 1 — Build the base Connect the corner pieces to the A poles to form the base frame of the tent.
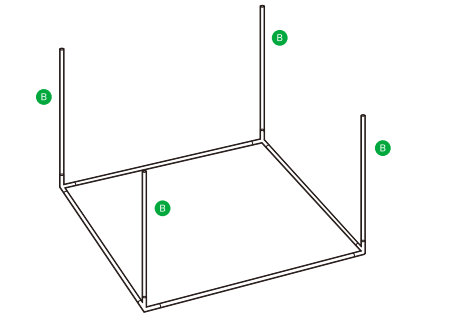
Step 2 — Attach the B poles Attach the B poles to the corner pieces you just assembled.
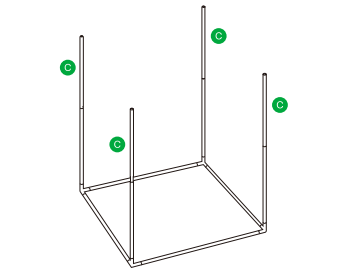
Step 3 — Form the sides Connect the C poles to the B poles. This completes the sides of the tent.
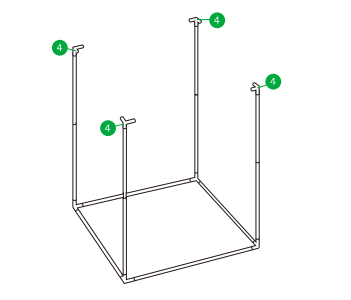
Step 4 — Add the top corners Attach corner pieces to the top of each C pole.
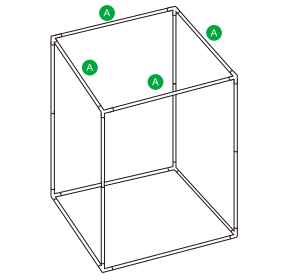
Step 5 — Complete the skeleton Add A poles to the top corner pieces, connecting each corner together to form the top frame. The full skeleton is now assembled.
Step 6 — Set the base cover Lay the tent's bottom canvas flat and place the skeleton inside it. It will be a snug fit — start with the corners, then pull the rest of the canvas around the remaining sides.
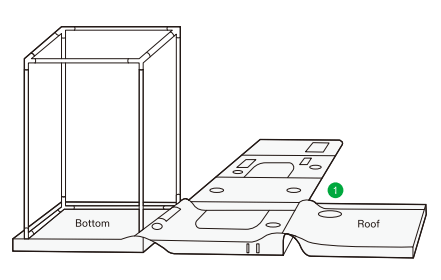
Step 7 — Cover the frame Lift the canvas up and pull it over the top of the skeleton frame.
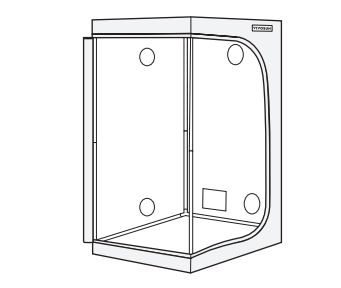
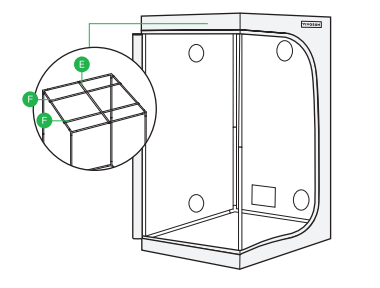
Step 8 — Add support poles Connect the E pole and F poles to the A poles to reinforce the structure — you'll see them cross in an X pattern. The E pole is the lighter bar; the F poles are the heavier bars. These are also what you'll use to hang equipment like your LED light and fan later.
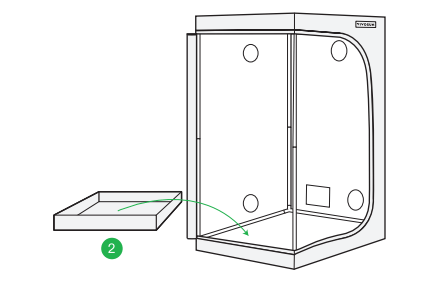
Step 9 — Insert the floor tray Place the floor tray inside the tent to catch dirt, runoff, or water spills.
Step 10 — Zip up and finish Zip the door closed and you're done. The tent also includes a viewing window, ventilation ports, and ducting ports to make daily operation easier.
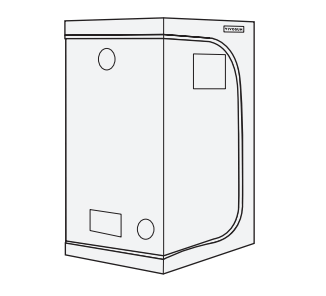
That's it — your grow tent is fully set up. Learning how to set up a grow tent is just step one; next comes lighting, ventilation, and the rest of your equipment (see below).
Common Setup Mistakes to Avoid
- Forcing the canvas on before the frame is square. If corners don't line up, recheck the pole connections before pulling the cover on — forcing it can bend poles or tear seams.
- Skipping the corner-first approach in Step 6. Pulling the canvas over from one side first often leaves it misaligned. Anchor all four corners before adjusting the sides.
- Mixing up the E and F poles. The heavier F poles are load-bearing for lights and fans; using the lighter E pole in the wrong spot can cause sagging once equipment is hung.
- Not checking zippers before loading equipment. Test that doors and vents move freely before you mount lights, filters, or ducting — much harder to fix afterward.
- Setting up on an uneven floor. Small floor irregularities get magnified once poles are under tension; a flat surface makes the frame noticeably easier to square up.
Frequently Asked Questions
How long does it take to set up a grow tent? Most growers finish a 4x4 grow tent in 10 to 20 minutes once all the pieces are laid out.
What if my grow tent is missing parts? Contact VIVOSUN support right away with your order details — we'll help identify and send the missing piece.
Do all VIVOSUN grow tent sizes assemble the same way? The overall process is the same across sizes (2x2 up to 10x10), though larger tents have more poles and may take a few extra minutes.
Can one person set up a grow tent alone? Yes — the design is built for solo assembly, though a second person can make pulling the canvas over the frame (Steps 6–7) a bit faster.
What tools do I need to set up a grow tent? None — VIVOSUN grow tents are tool-free and snap together by hand.
What to Do After Setup: Lighting, Ventilation & Equipment
With the tent built, the next steps are:
- Choose a grow light sized to your tent footprint (LED is the most common choice for 4x4 setups) - How Many Grow Lights Do You Need?
- Install your inline fan and carbon filter to manage airflow and odor - How to Set Up A Ventilation System?
- Run ducting through the designated ports to connect your fan and filter
- Set up humidity and temperature monitoring to keep your environment in range through Veg and Flower
Have questions along the way? Reach out to us any time — and check out our other grow guides for more tips on getting the most out of your indoor garden.
Join our Facebook grower community o Reddit community for exclusive contests and prizes.