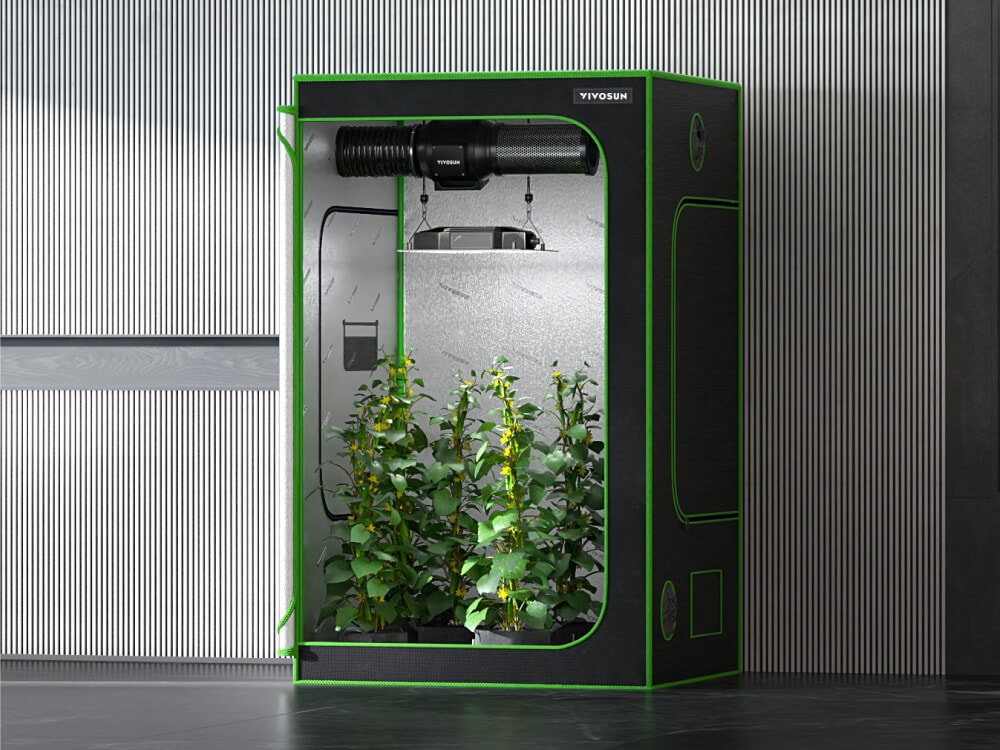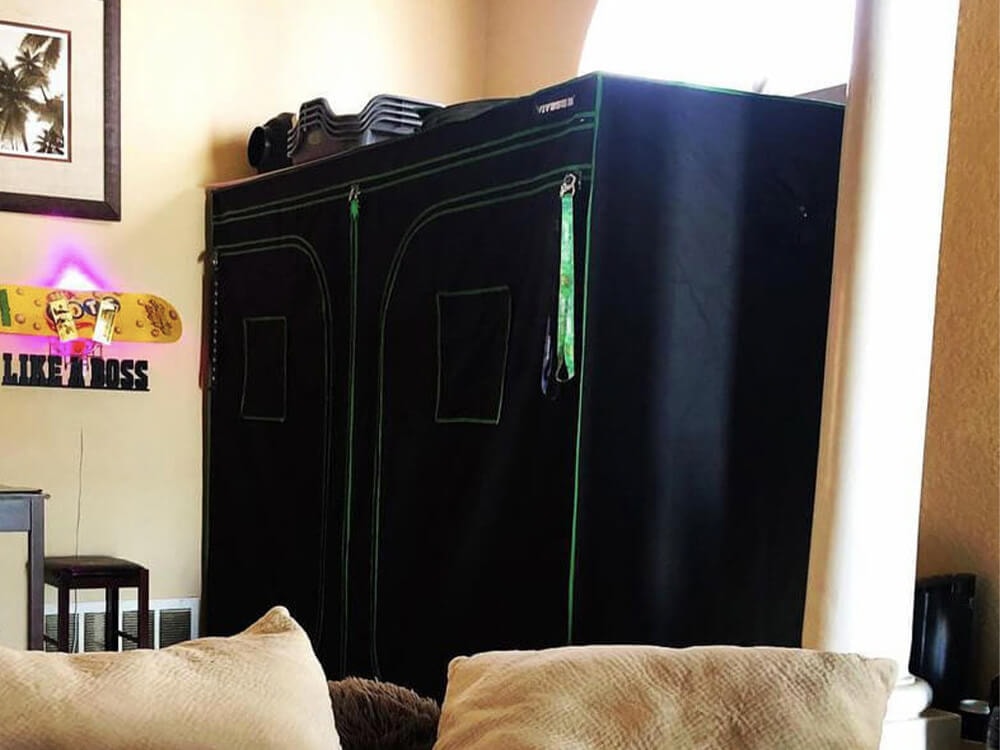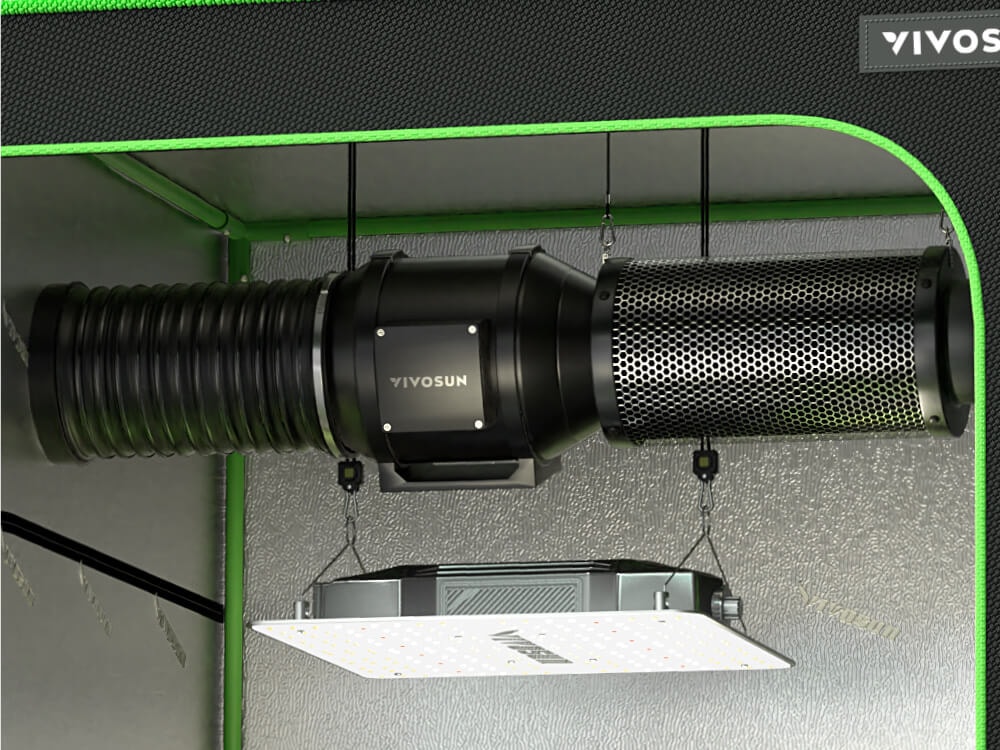
Ventilation and lighting are the two most critical environmental systems in any grow tent — get them right, and everything else (temperature, humidity, CO2, plant health) becomes much easier to manage. This guide breaks the full ventilation setup into clear, illustrated steps so you can get it right the first time.
Already built your tent frame? If not, start with our How to Set Up a Grow Tent guide
What Equipment Do You Need?
| Component | What It Does |
|---|---|
| Inline fan | A tube-shaped fan, rated in CFM (cubic feet per minute), that pushes air through the tent to bring in fresh air and CO2 while controlling temperature and humidity |
| Carbon filter | Attaches to the inline fan to remove odors before air is exhausted. Not strictly required, but recommended — one filter typically lasts a full grow cycle |
| Ducting | Flexible aluminum tubing that channels air between the fan/filter and the outside of your tent |
Curious whether your grow tent needs a carbon filter? Check out Should I Use Carbon Filters in My Grow Room? to find out.
For this walkthrough, we're using the VIVOSUN AeroZesh G4 Inline Duct Fan Kit as our example — it bundles everything you need in one box: a 4" AeroZesh G4 inline fan (195 CFM, 28 dBA), a 4" carbon filter, 8ft of 4" ducting with stainless clamps, and the GrowHub E42A+ WiFi controller for app-based fan speed and environment monitoring. The same steps below apply to any VIVOSUN inline fan and filter combo, with minor size adjustments.
How to Set Up Grow Tent Ventilation: 9 Steps
Step 1: Prep the Carbon Filter
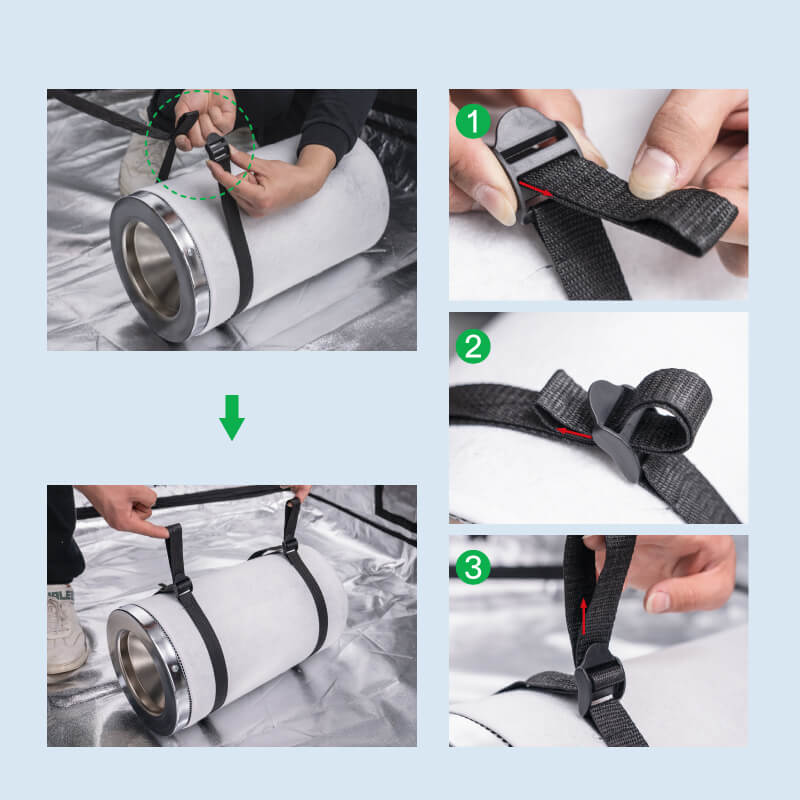
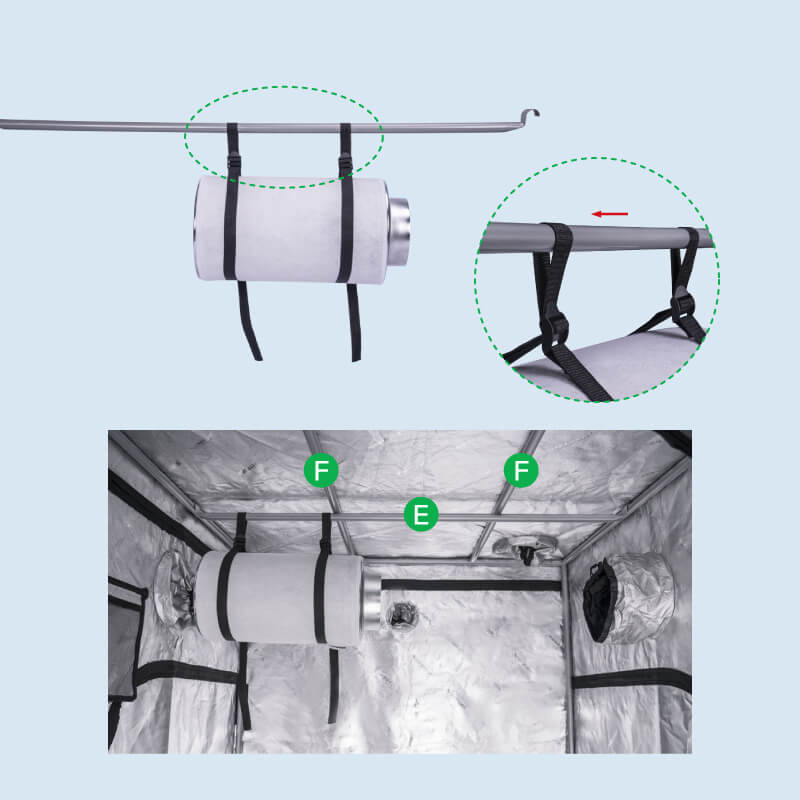
Open your VIVOSUN AeroZesh G4 Inline Duct Fan Kit — you'll find the AeroZesh G4 inline fan, the GrowHub E42A+ controller, a 4" carbon filter, and 8ft of 4" ducting. The carbon filter comes with a pair of rope hangers already attached, so there's no need to tie straps from scratch. First, check whether the white pre-filter fabric is already wrapped around the carbon filter; if not, attach it before hanging the filter.
Next, prep the rope hangers:
- Check that both rope hangers are securely attached to the carbon filter and sitting level with each other.
- Extend each hanger to roughly the same length so the filter will hang evenly.
- If either hanger feels loose, pull it snug before moving on to Step 2.
Step 2: Hang the Carbon Filter
- Remove the E pole from the tent frame and thread it through the carbon filter's rope hangers.
- Re-hang the E pole back onto the tent.
- Keep the filter level and parallel to the support poles — don't let it lean against anything or tilt up/down, as this reduces airflow. Adjust the rope hangers if needed.
Step 3 (Optional): Mounting the Filter Outside the Tent
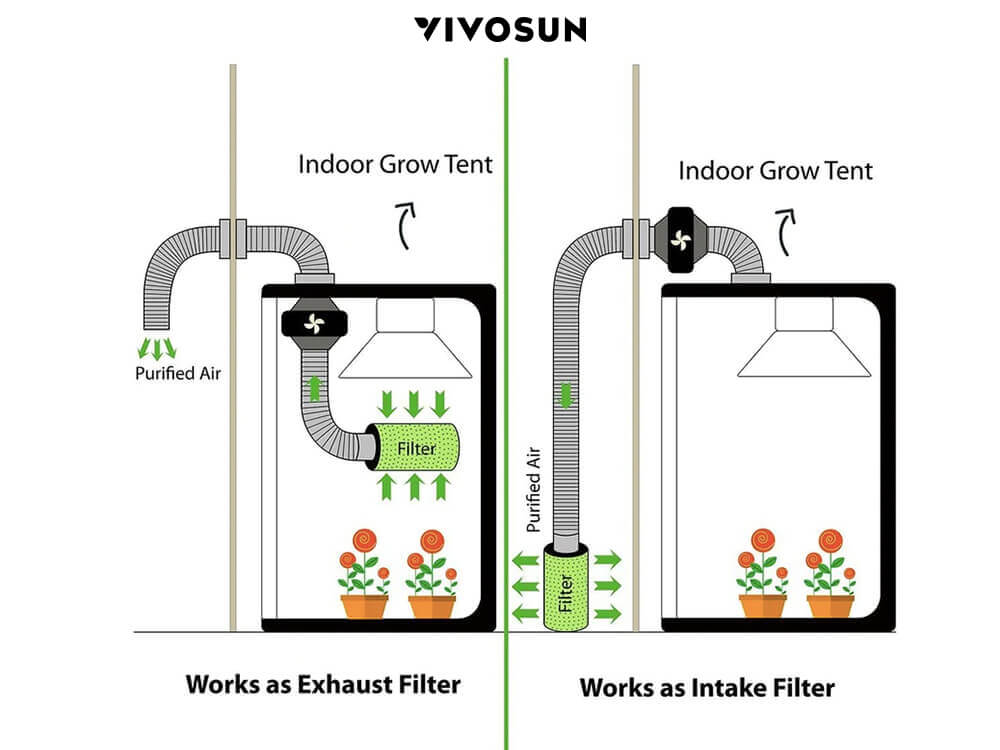
You can place the carbon filter outside the tent instead, though we don't recommend it — filtering air before it reaches the inline fan works better. If you do go this route, you can hang the filter the same way as above or simply rest it on the ground outside the tent.
Step 4: Set Up the Rope Hangers
We recommend rope ratchet hangers — they make adjusting fan height simple.
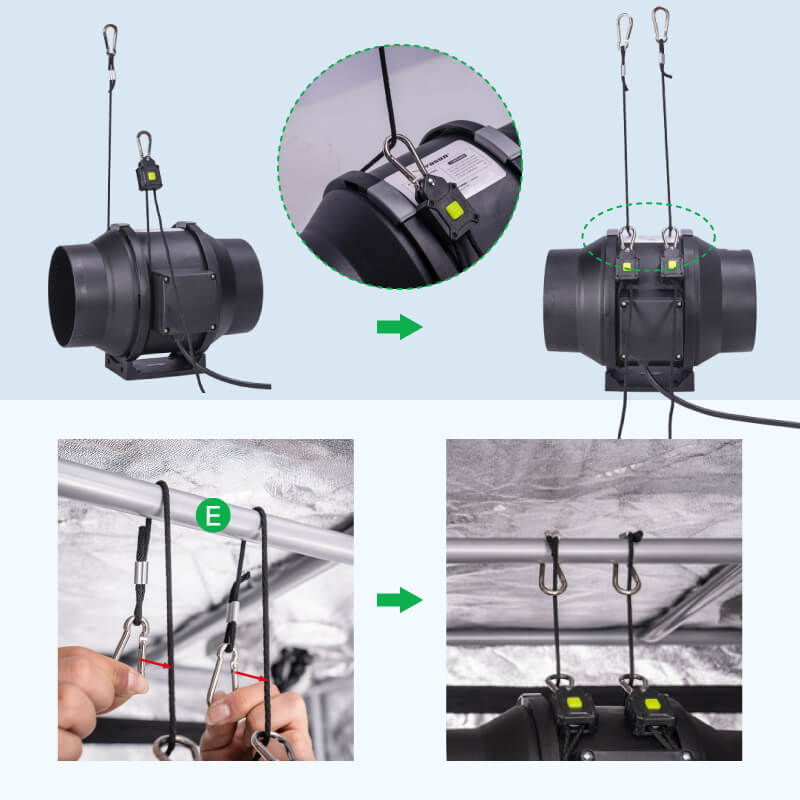
- Thread a rope hanger through the base of the inline fan, with the adjustable hook slightly lower than the fixed side.
- Hook the adjustable hook to the rope on the opposite side of the fan.
- Repeat with the second hanger on the other side.
- Wrap the longer, fixed-hook side of the rope around the E pole and hook it in place.
Step 5: Hang the Inline Fan
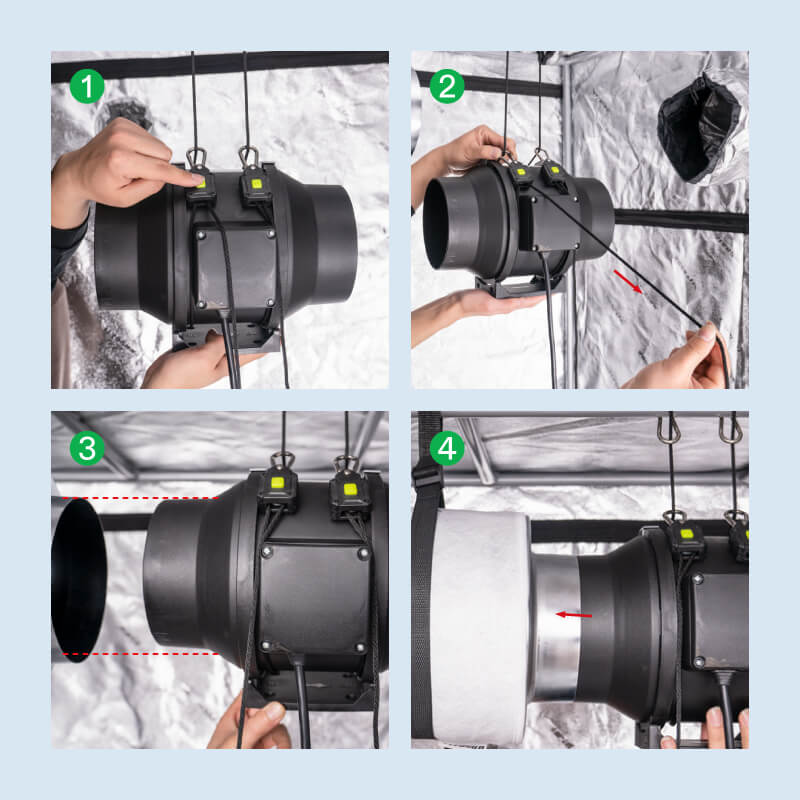
Use the yellow button on the adjustable hook to raise or lower the fan — always support the fan's base with one hand while adjusting so it doesn't drop.
Once the fan and carbon filter are level with each other, fit the fan's flange tightly into the filter opening. Seal the connection with ventilation tape for an airtight fit.
No rope hangers? Here are alternatives:
- Thick string (1/8"): tie directly around the fan in place of rope.
- Bungee cords: attach the fan to the tent's cross bars.
- Zip ties: thread through the four screw holes on the mounting plate and wrap around the cross beams.
- Mounting bracket + 2x4: for a fixed, vibration-free install, screw a 2x4 to a solid structure and mount the fan's bracket directly to it.
Step 6: Connect the Ducting to the Fan
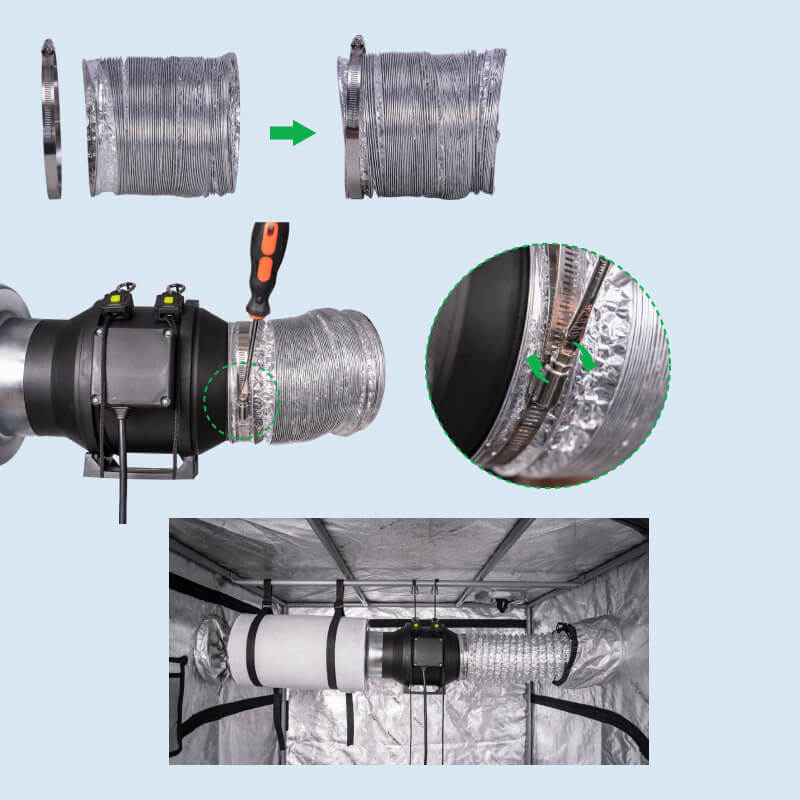
- The AeroZesh G4 kit's 8ft, 4" ducting ships compressed like a spring — pull it out to your needed length, and trim with scissors and a wire cutter if it's too long.
- Slide one of the included stainless steel clamps onto the duct before attaching it to the fan, then slide the clamp over the connection point once attached.
- Tighten the clamp's screw with a screwdriver or drill until the seal is airtight.
At this point, your ventilation system is roughly 90% complete.
Step 7: Manage the Excess Rope
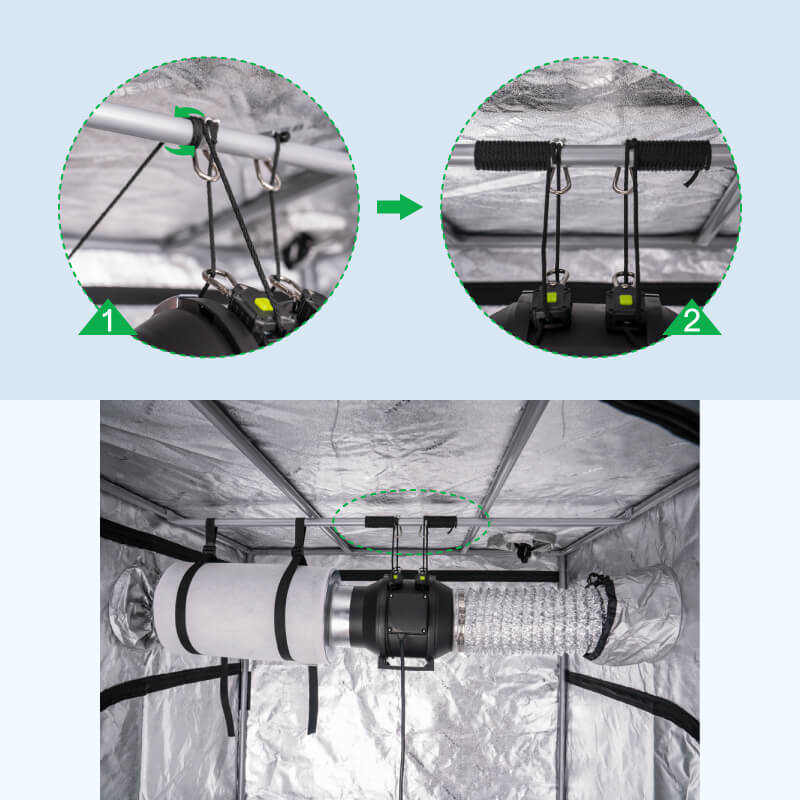
Because the fan hangs from an overhead support, extra rope will hang down inside the tent after installation. Coil the excess rope around the same pole the fan hangs from, and tuck the free end under the coils to secure it — this keeps it out of the way and prevents it from becoming a snag hazard.
Step 8: Hang Your Grow Light
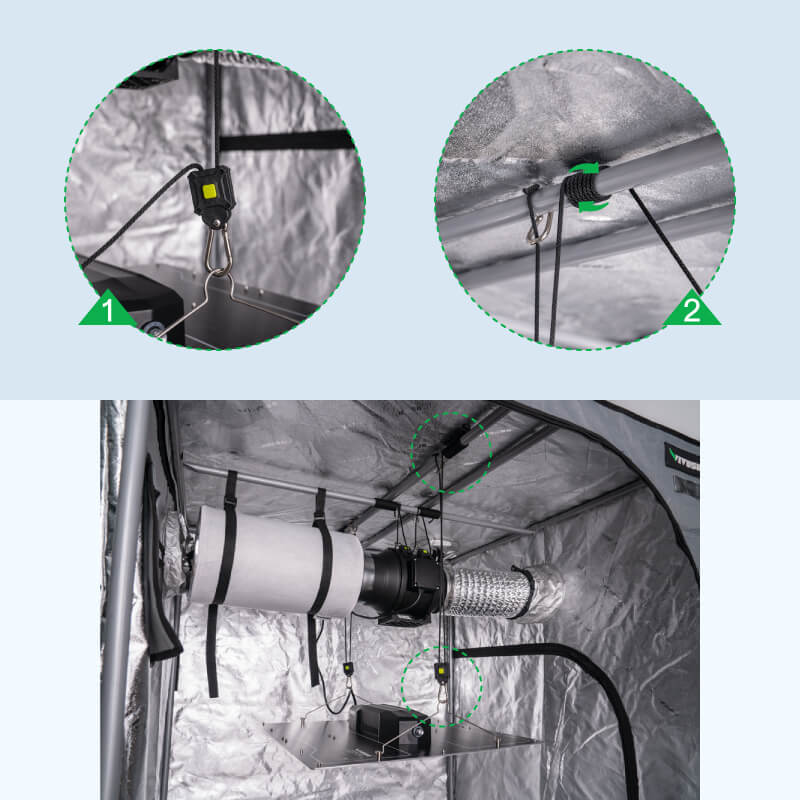
Set up your ventilation system before hanging your grow light — the light should always go up last. Most VIVOSUN grow lights (we'll assume LED here, since most growers have switched over) come with their own rope hangers.
Because LED lights are heavier than a carbon filter and fan combined, always hang the light from an F pole (either one works) — never the lighter E pole — and position it lower than the ventilation system. Attach the rope hanger's adjustable hook to the light first, then hook it onto the F pole. Coil any excess rope the same way as Step 7.
Step 9: Adjust the Light Height
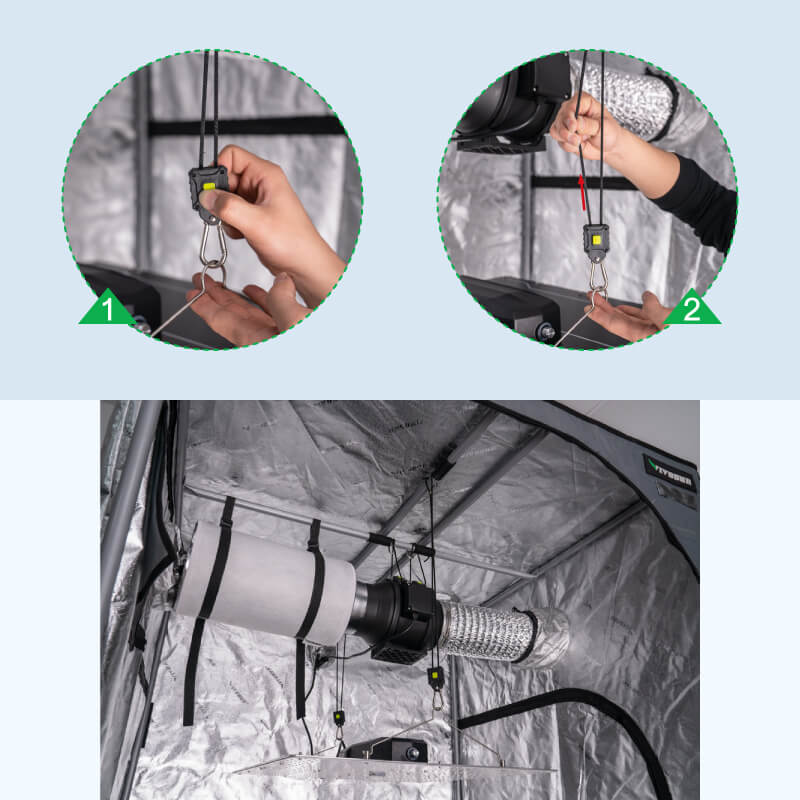
Press the yellow button on the adjustable hook and pull the left side of the rope to raise or lower the light — hold the light's hook steady while you adjust to keep it from swinging.
This walkthrough uses a 4x4 grow tent as the reference size, but the same steps apply to any tent size with only minor adjustments to rope length and duct sizing.
Bonus: Set Up the GrowHub E42A+ Controller If you're using the AeroZesh G4 kit, plug the GrowHub E42A+ controller into the fan and place its temp/humidity probe inside the tent. Download the VIVOSUN app, connect the controller over WiFi, and you'll be able to adjust fan speed, monitor VPD, and check tent conditions remotely from your phone.
Common Ventilation Setup Mistakes
- Hanging the light before the ventilation system. This almost always leads to tangled ropes and having to redo the fan/filter setup. Ventilation first, light last.
- Loose ducting clamps. An improperly sealed clamp lets air (and smell) escape at the connection point — always check the seal is airtight before closing up the tent.
- Tilted carbon filter. A filter that isn't level restricts airflow and reduces its effectiveness — recheck rope hanger tension if it's leaning.
- Using the E pole for the grow light. The E pole isn't rated for the weight of most LED fixtures; use an F pole to avoid sagging or pole failure.
- Skipping ventilation tape at the fan-to-filter connection. Even a snug physical fit can leak air without tape sealing the joint.
Frequently Asked Questions
Do I need a carbon filter, or just an inline fan? A carbon filter isn't strictly required for airflow, but it's the only component that controls odor — most growers, especially indoors or in shared buildings, add one.
Which pole should the grow light hang from? Always the F pole (the heavier support bar), never the E pole, due to weight.
How do I know if my ducting connection is airtight? Check the clamp is fully tightened and consider sealing the joint with ventilation tape — a poor seal often shows up as reduced airflow or lingering odor.
Does this setup process change for larger tents (5x5, 10x10)? The steps are the same; larger tents just need longer ducting runs and a higher-CFM fan sized to the tent's volume.
How often should I run my grow tent ventilation? This depends on your grow stage and tent conditions — see our dedicated guide, How Often Should I Run My Grow Tent Ventilation, for specifics.
What to Do Next
With ventilation and lighting installed, your tent's core systems are in place. From here:
- Haven't assembled your tent frame yet? Go back to How to Set Up a Grow Tent for the full frame build.
- Set up humidity and temperature monitoring to keep conditions in range through Veg and Flower.
- Learn how often to run your ventilation at each growth stage.
- Not sure if you need a carbon filter? Read Should I Use Carbon Filters in My Grow Room.
- Once your filter is due for a change, see The Best Ways to Clean a Carbon Filter in a Grow Room.
If you have any questions, don't hesitate to reach out — and check out our other grow guides for more tips on getting the most out of your indoor garden.
Join our Facebook grower community o Reddit Community for even more exclusive contests and prizes!