

English
Carbon Filter Manual
MODEL NAME
-
VSV-CFS4
-
VSV-CFS6
-
VSV-CFS8
-
VSV-CFS4-BK
-
VSV-CFS6-BK
-
VSV-CFS8-BK
SAFETY INFORMATION
Please read the following information carefully before installing and using. Failure to observe these safety instructions may result in serious injury and will release VIVOSUN of all liability and void all product warranties.
-
Check and comply with your local law and restrictions for additional safety requirements for the installation and operation of the product.
-
DO NOT use in the potentially hazardous environment such as flammable, explosive, corrosive, or wet atmospheres.
-
Make sure the safety systems are in place in case of any fire accident.
-
DO NOT spray water or use chemicals such as gasoline, benzene and diluent to clean the filter.
-
Follow these instructions; frequent cleaning and maintenance is recommended to increase the longevity of the product.
-
Ducted products must always be vented to outdoor areas.
-
The product pairs with devices with rotating parts. Be careful during installation, operation, and maintenance. Keep this product away from children.
-
DO NOT use the product if it is damaged when received. Please contact us for a replacement as this is considered a manufacturing defect.
-
Use with appropriate inline duct fans and accessories (air pipes, clamps etc.) or contact us for recommendations. Any improper use of accessories will void product warranties.
-
Check local authority requirements for proper disposal of waste and residues.
PRODUCT CONTENTS
VSV-CFS4/VSV-CFS6/VSV-CFS8
| Image | Name | Box Number |
|---|---|---|
|
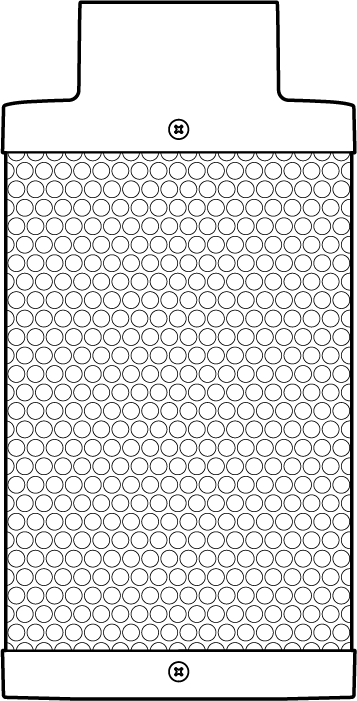
Carbon Filter |
1 pc |
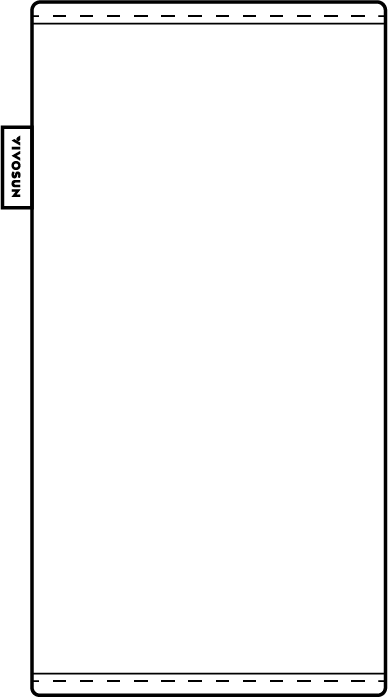
|
Prefilter |
1 pc |
|
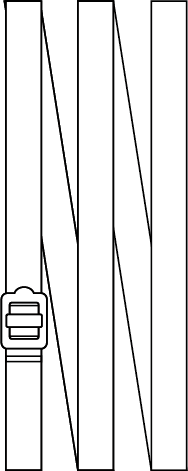
Hanging Straps |
2 pcs |
VSV-CFS4-BK/VSV-CFS6-BK/VSV-CFS8-BK
| Image | Name | Box Number |
|---|---|---|
|
Carbon Filter |
1 pc |
|
Prefilter |
1 pc |
|
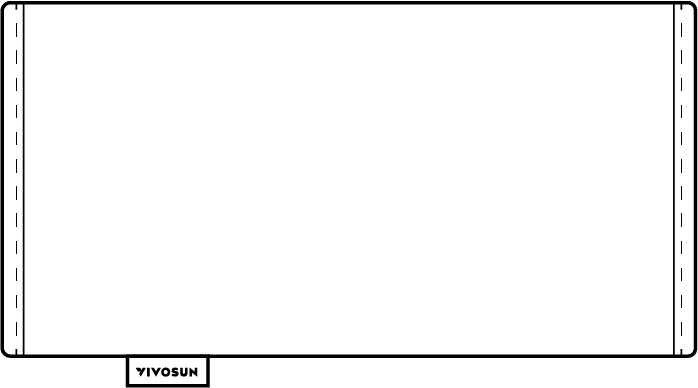
Rope Hanger |
2 pcs |
|
Hanging Straps |
2 pcs |
KEY FEATURES
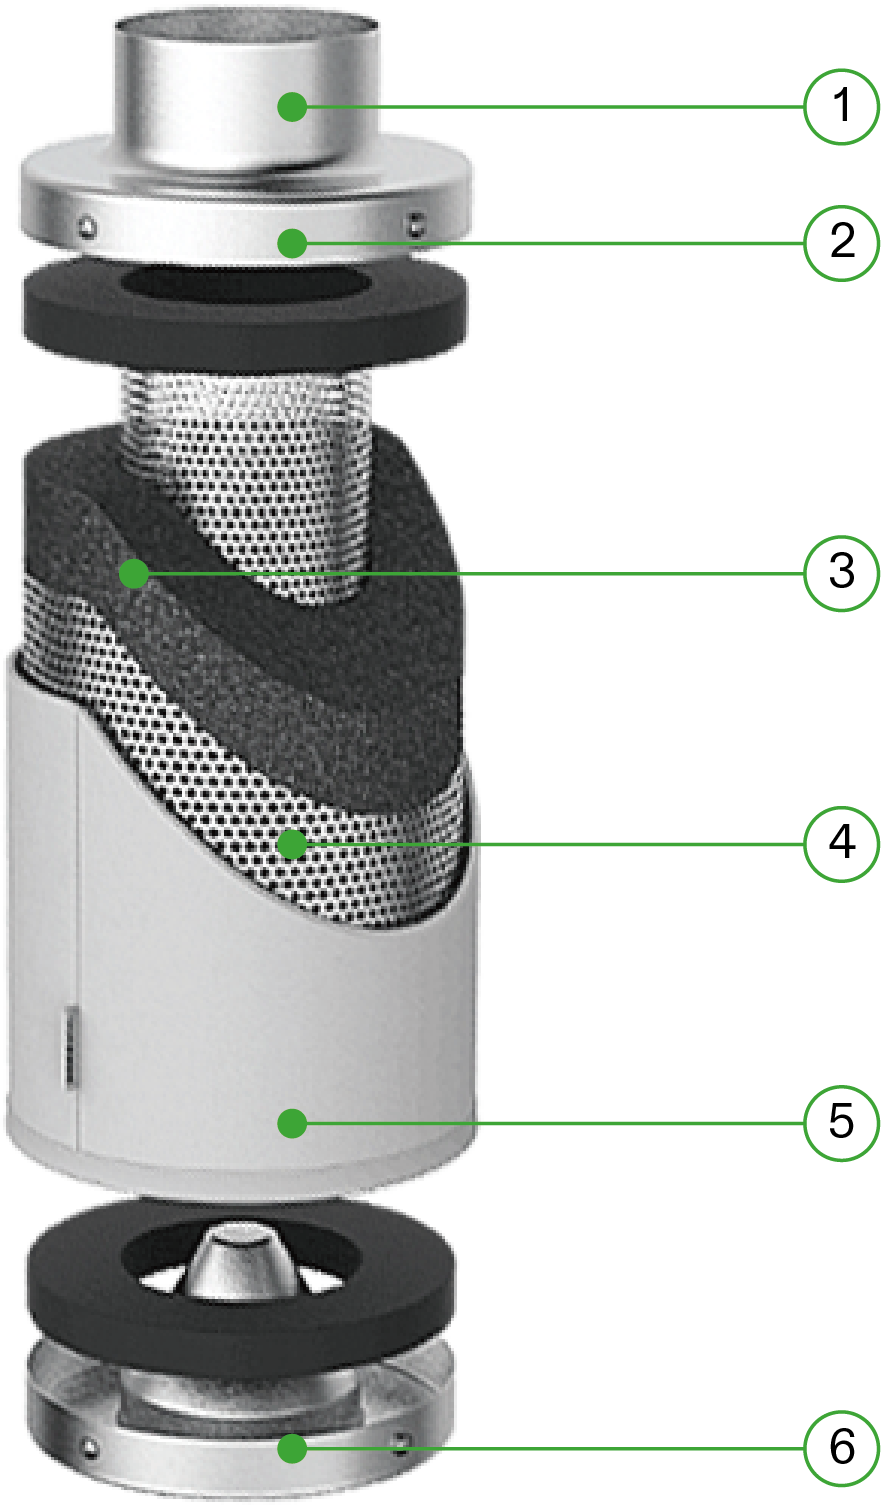
① |
4''- 8'' (10.2cm-20.3cm)size is suitable for different types inline duct fans |
② |
Adjustable flanges and flexible installation |
③ |
1200+ RC 412 Australian Virgin Charcoal for efficient odor control |
④ |
High Airflow Inner And Outer Mesh |
⑤ |
Prefilter included to prevent impurities and increase lifespan |
⑥ |
Durable Long Service Life |
DIMENSIONS
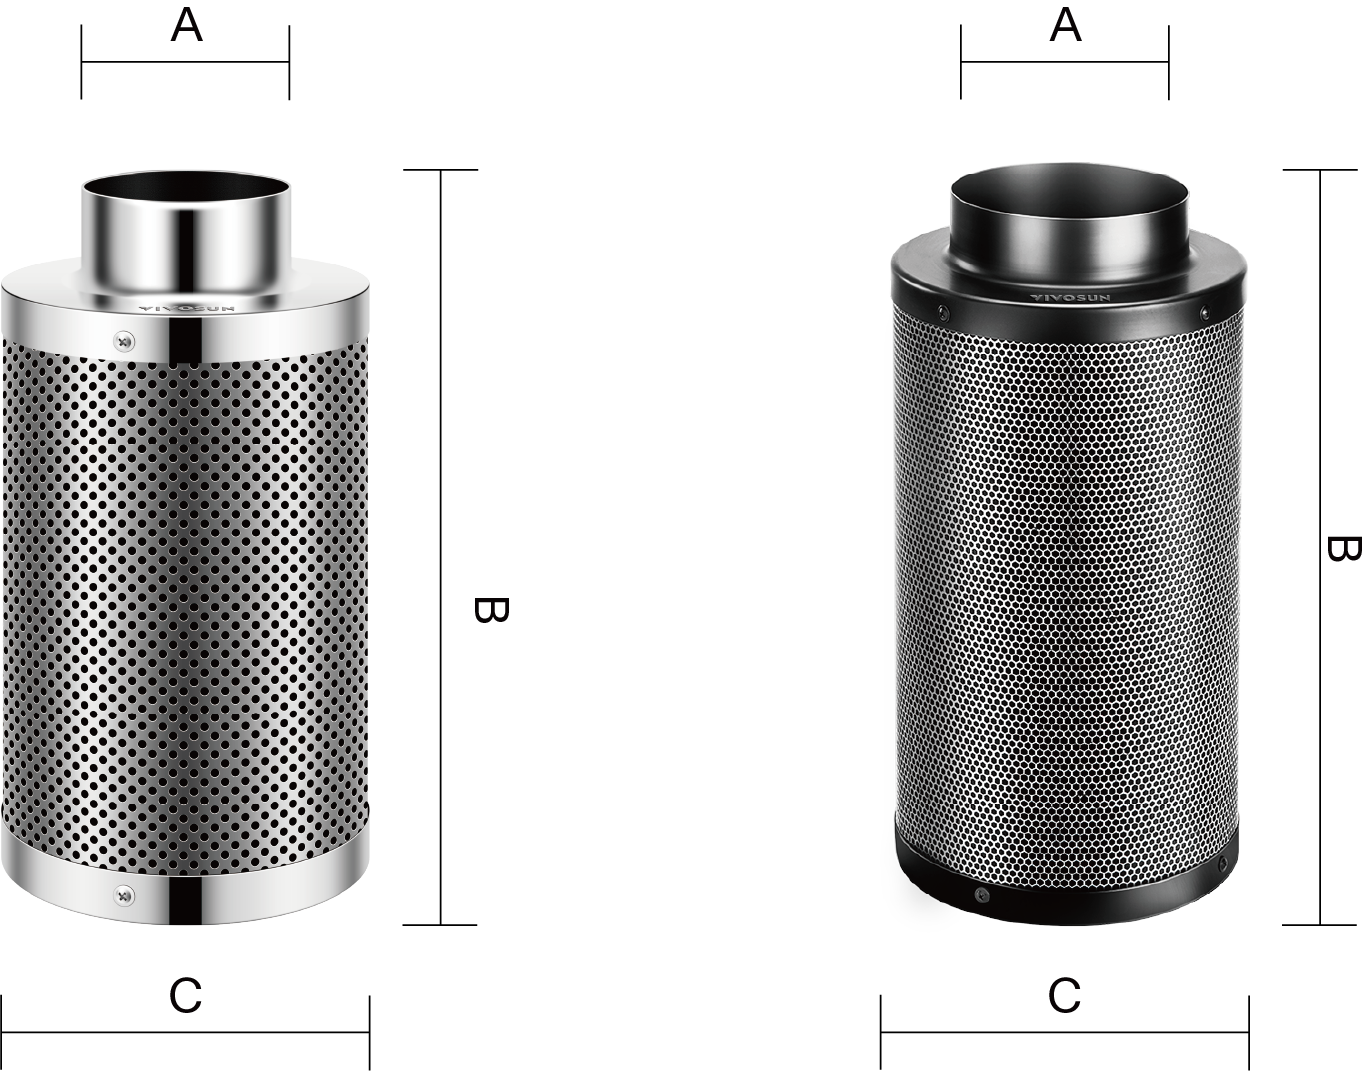
| VSV-CFS4 | VSV-CFS6 | VSV-CFS8 | VSV-CFS4-BK | VSV-CFS6-BK | VSV-CFS8-BK | |
|---|---|---|---|---|---|---|
A |
3.9''/10cm |
5.9''/15cm |
7.9''/20cm |
3.9''/10cm |
5.9''/15cm |
7.9''/20cm |
B |
11.8''/30cm |
15.7''/40cm |
19.7''/50cm |
11.8''/30cm |
15.7''/40cm |
19.7''/50cm |
C |
6.9''/18cm |
8.9''/22cm |
10.9''/28cm |
6.9''/18cm |
8.9''/22cm |
10.9''/28cm |
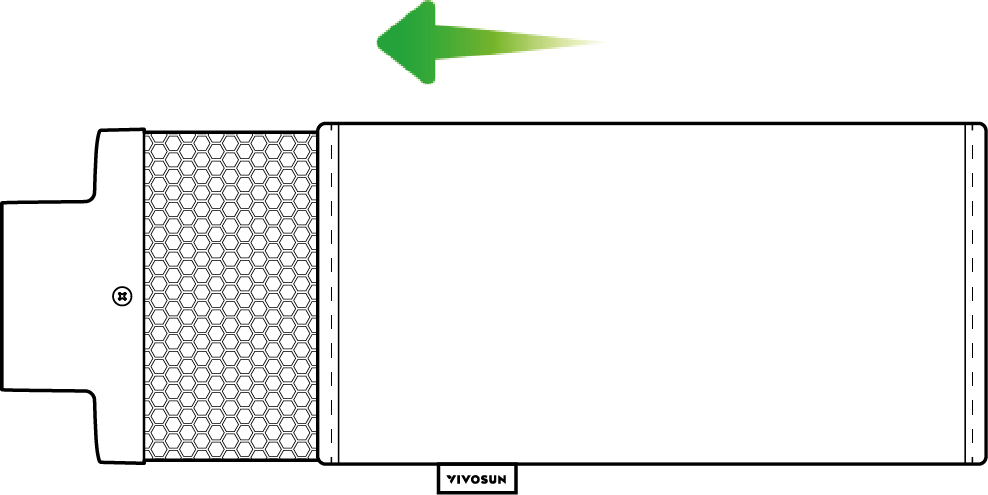
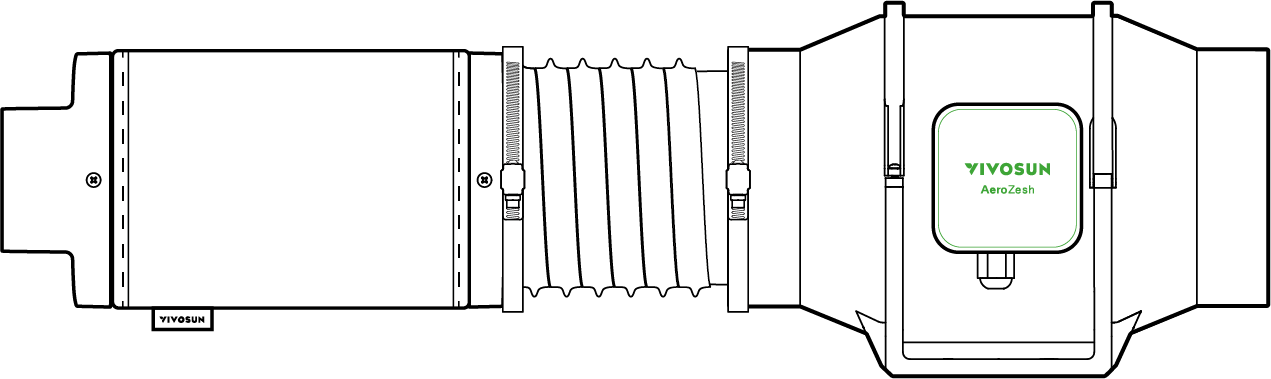
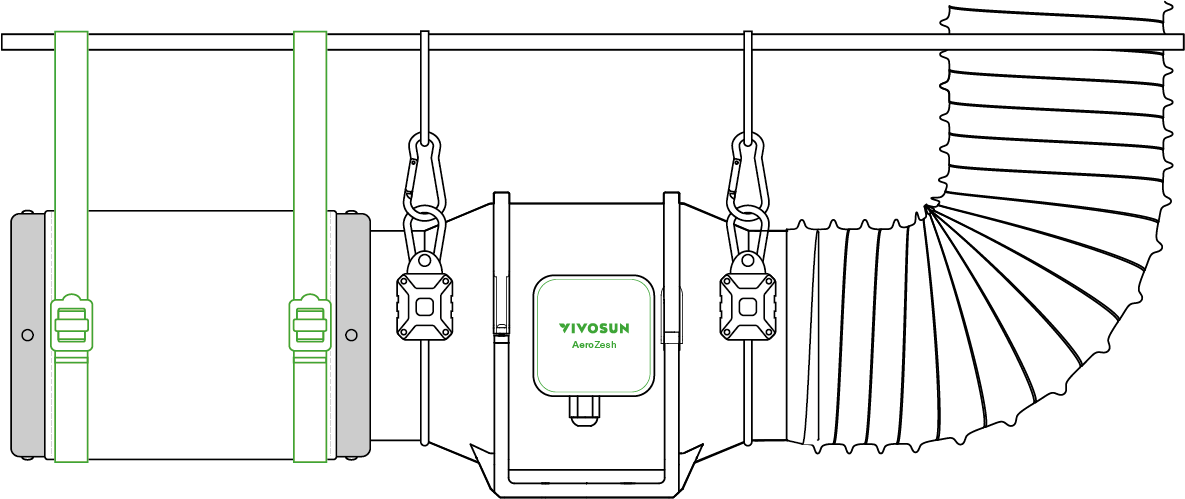
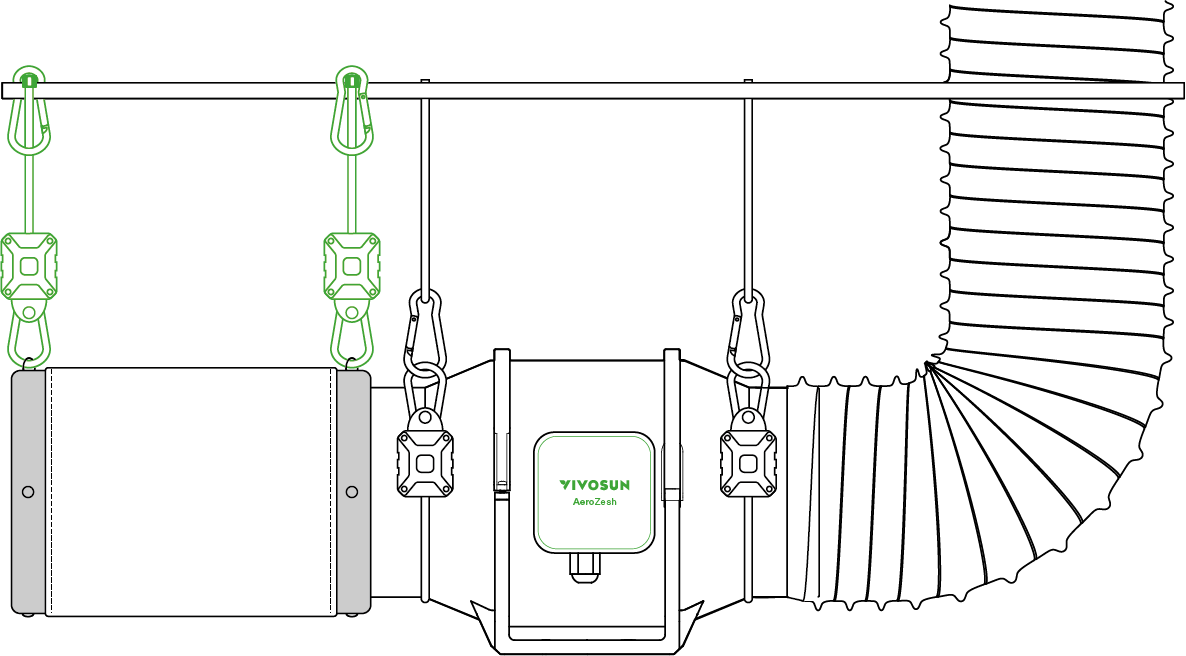
INSTALLATION
STEP 1
Slip the prefilter cloth onto your filter to prevent from dust or other particles. Ensure the prefilter cloth cover the entire metal mesh of the filter.
STEP 2
Connect the filter to an inline duct fan of same size in an appropriate direction for different applications (see the following instructions of ventilation setup). Use ducting tap to secure the connection if necessary.
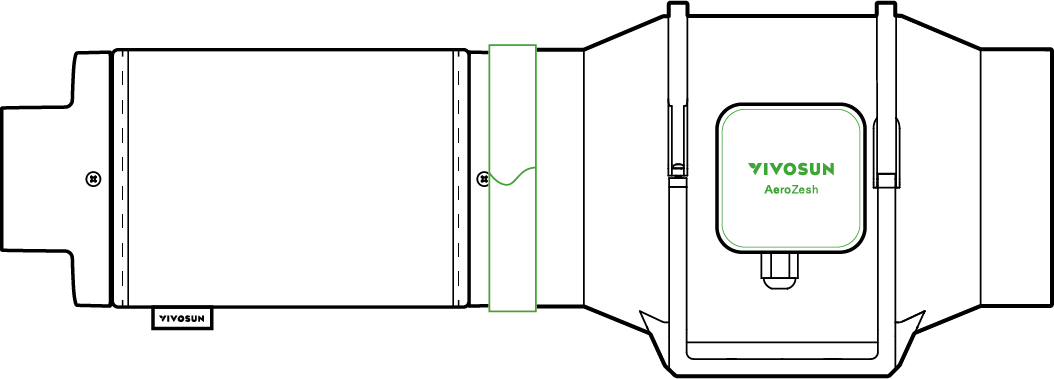
You can also connect the filter to a duct. Use a clamp to secure the connection.
STEP 3
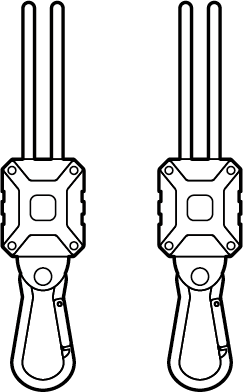
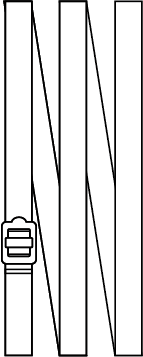
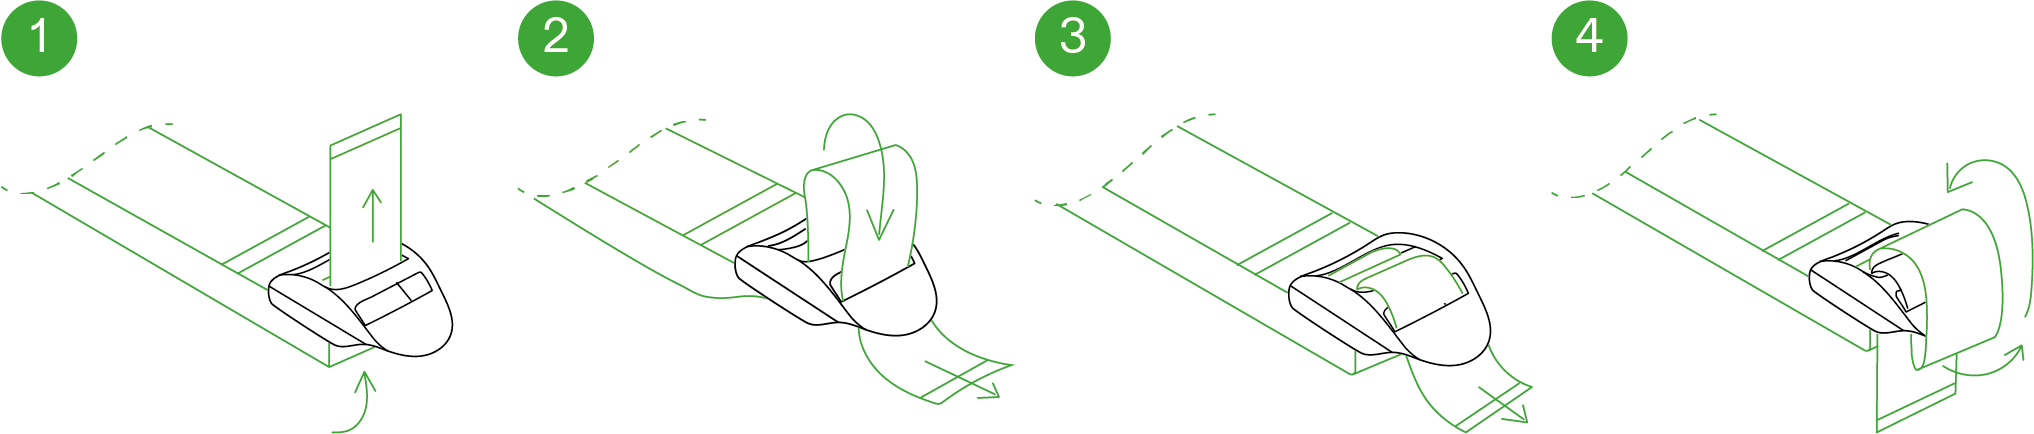
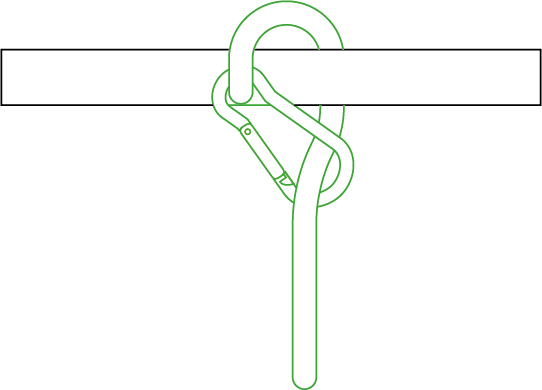
Loop the two hanging straps around the flanges and a hanging pole as shown in the diagram.

STEP 4
Slip the strap through the inner ladder lock slot from the bottom. Pass the strap into the outer ladder lock slot from the top. Adjust the length of the completed loop as needed. Tuck the loose end through the center gap of the ladder lock to secure the loop.
STEP 5
Connect your filter to a inline duct fan or a ducting in your preferred method.
HANGING WITH ROPE HANGERS (VSV-CFS4-BK/VSV-CFS6-BK/VSV-CFS8-BK)
STEP 1
Loop the clips of the rope hangers around a hanging pole.
STEP 2
Connect your filter to a inline duct fan or a ducting in your preferred method.
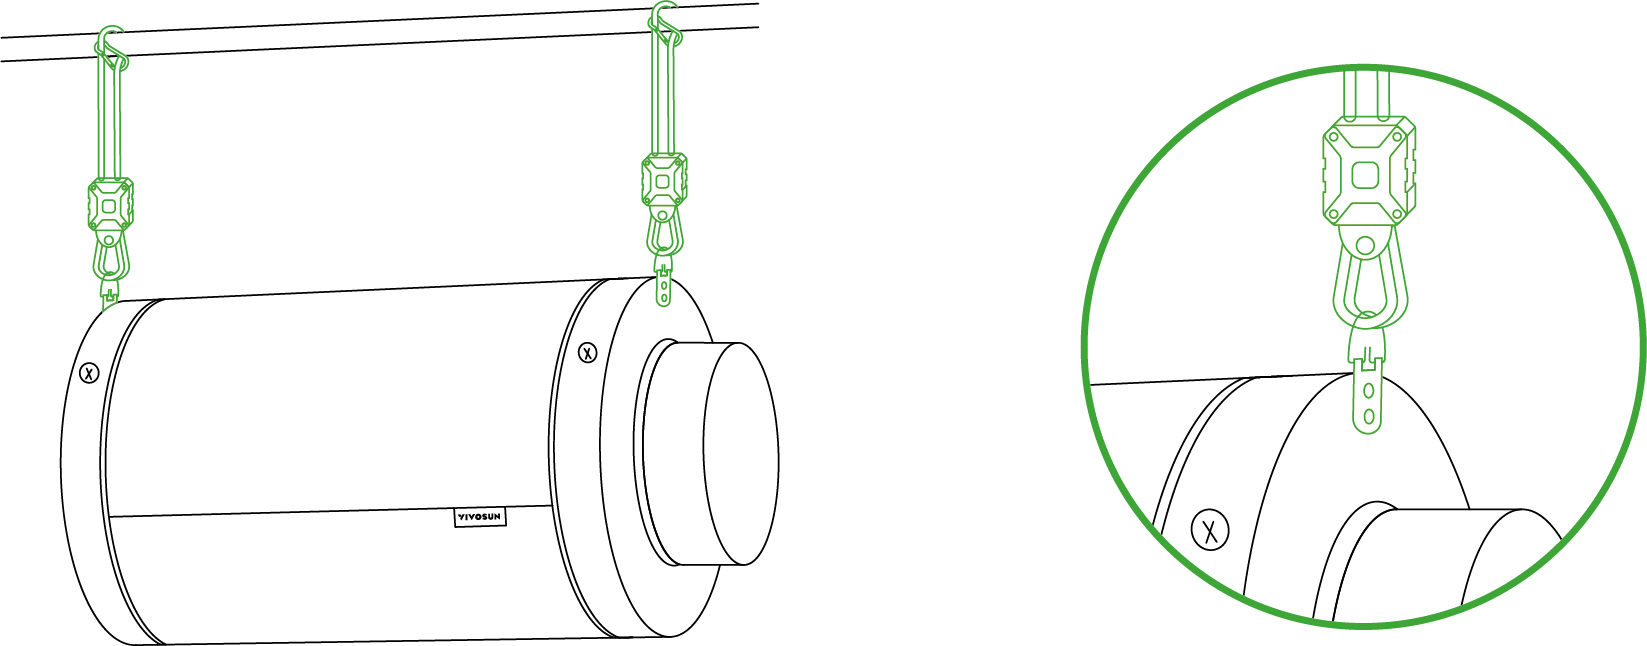
STEP 3
Connect your filter to a inline duct fan or a ducting in your preferred method.
VENTILATION SETUP
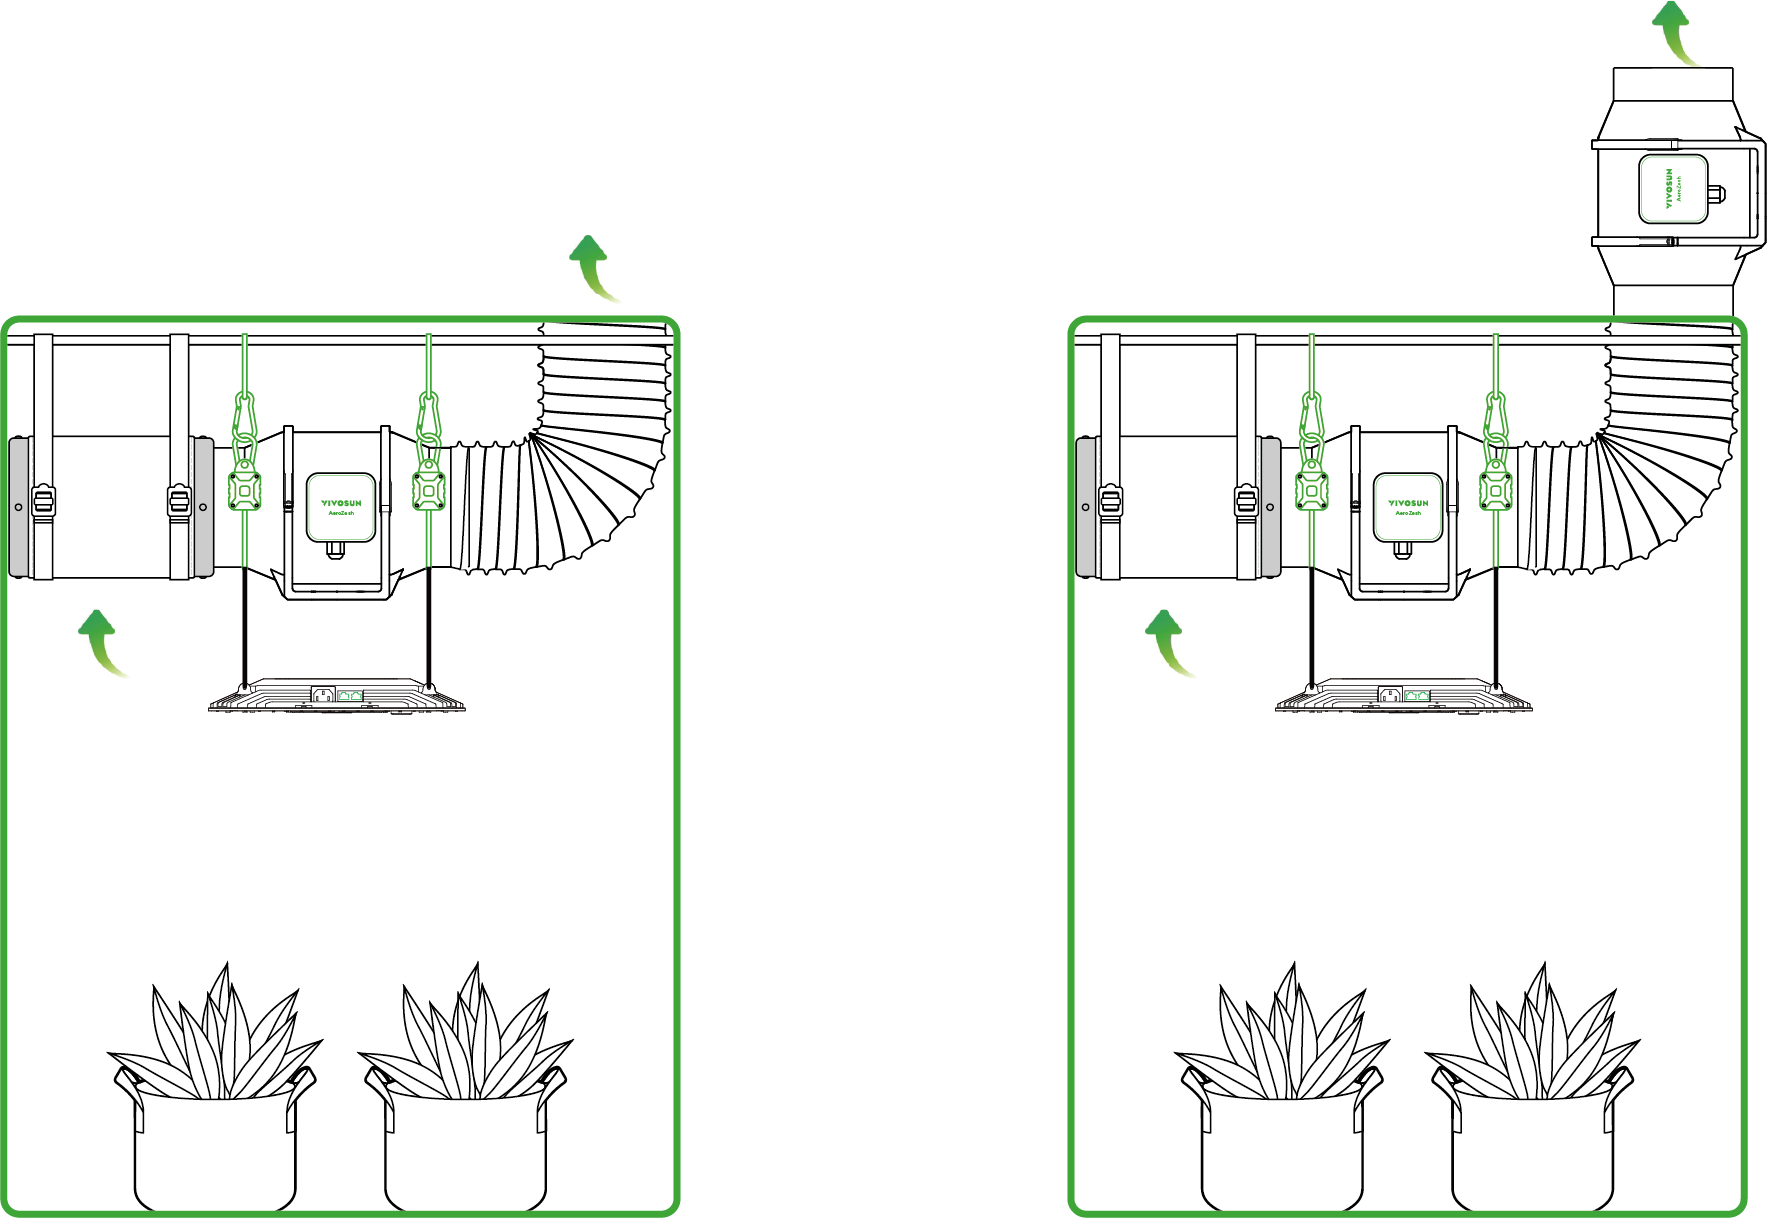
OPTION 1
Place the duct fan and filter inside the tent. The filter should be connected directly to the intake end of the duct fan.
OPTION 2
Place the duct fan outside the tent and filter inside the tent. The filter should be connected to the intake end of the duct fan through the ducting.
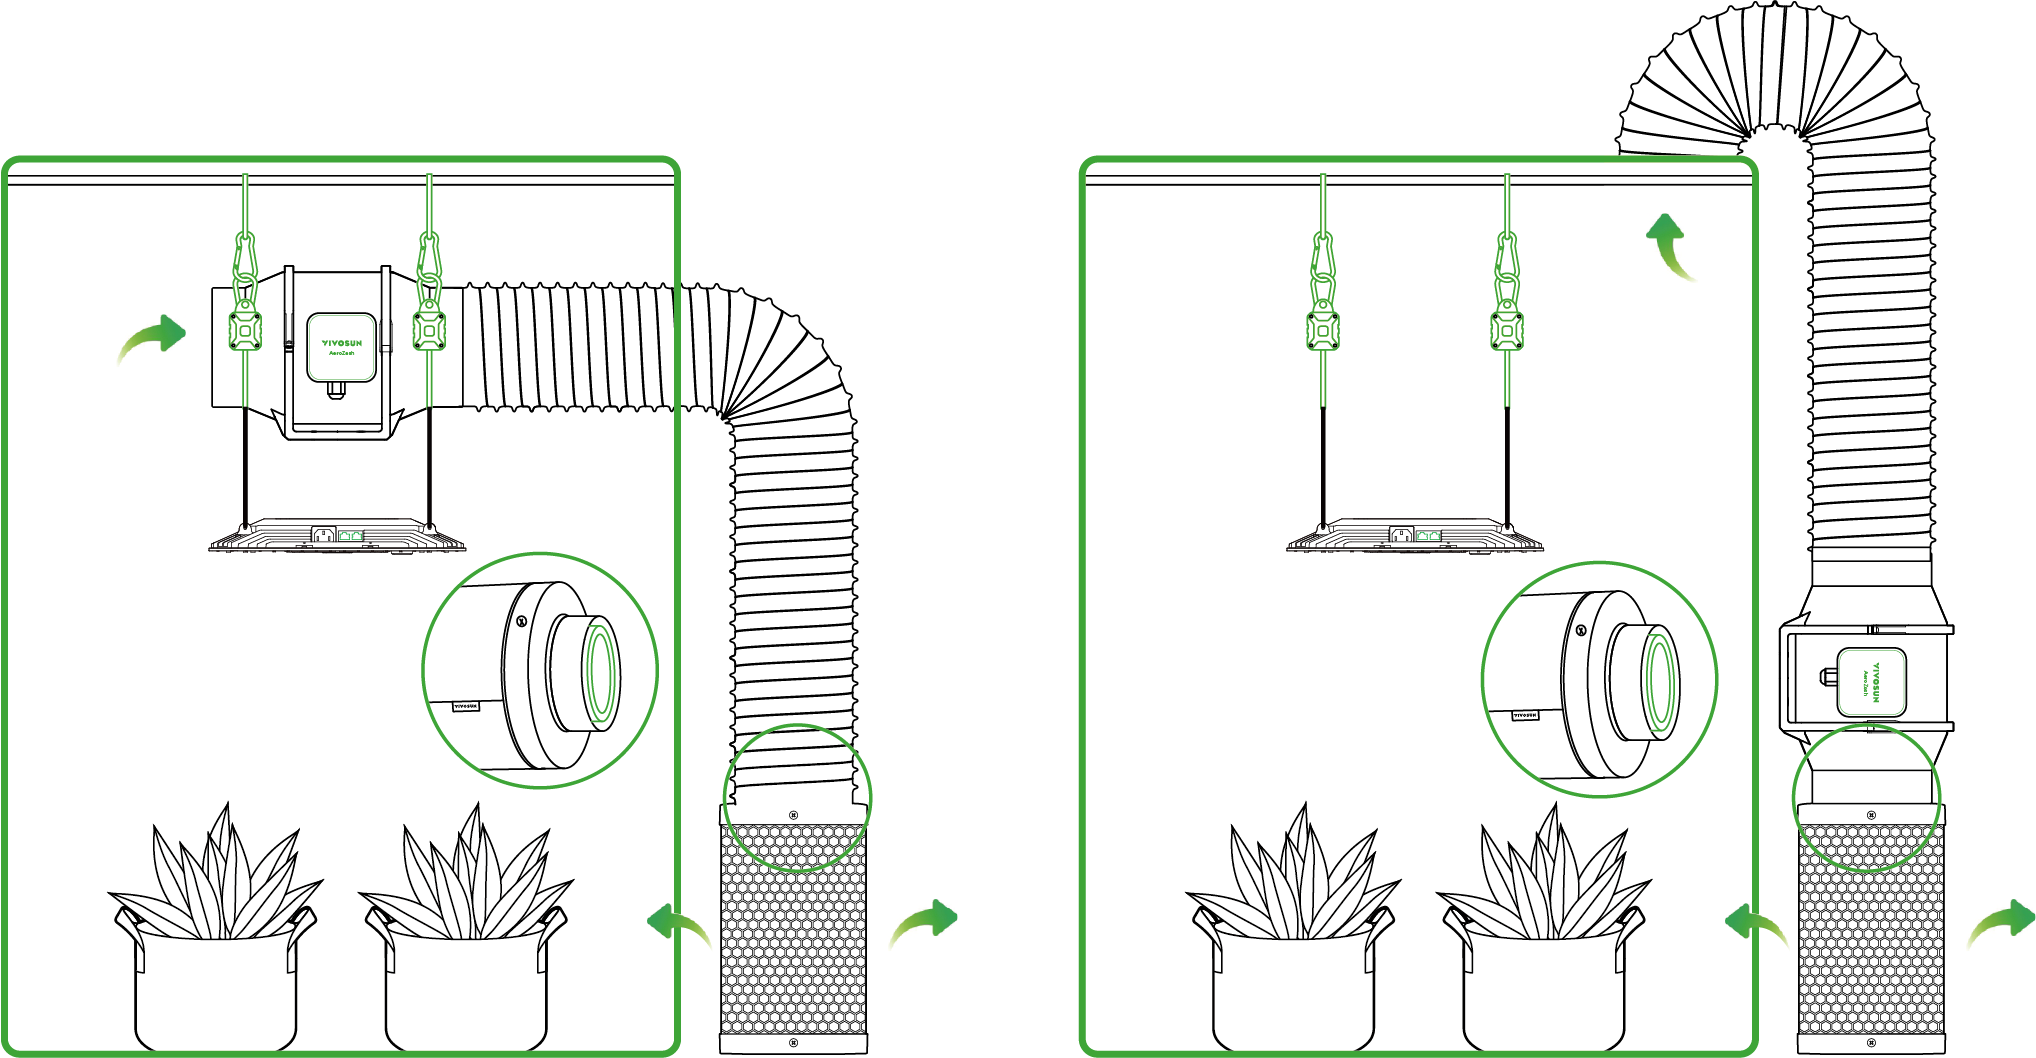
OPTION 3
Place the duct fan inside the tent and filter outside the tent. The filter should be connected to the exhaust end of the duct fan through the ducting. Place the prefilter inside of the filter to increase its lifetime.
OPTION 4
Place the duct fan and filter outside the tent to save more growing space. The filter should be connected directly to the exhaust end of the duct fan. Place the prefilter inside of the filter to increase its lifetime.
MAINTENANCE
Regular maintenance is suggested. Make sure to turn off power and unplug the connected duct fan before each maintenance. We suggest replacing the entire carbon filter every 6 months of use.
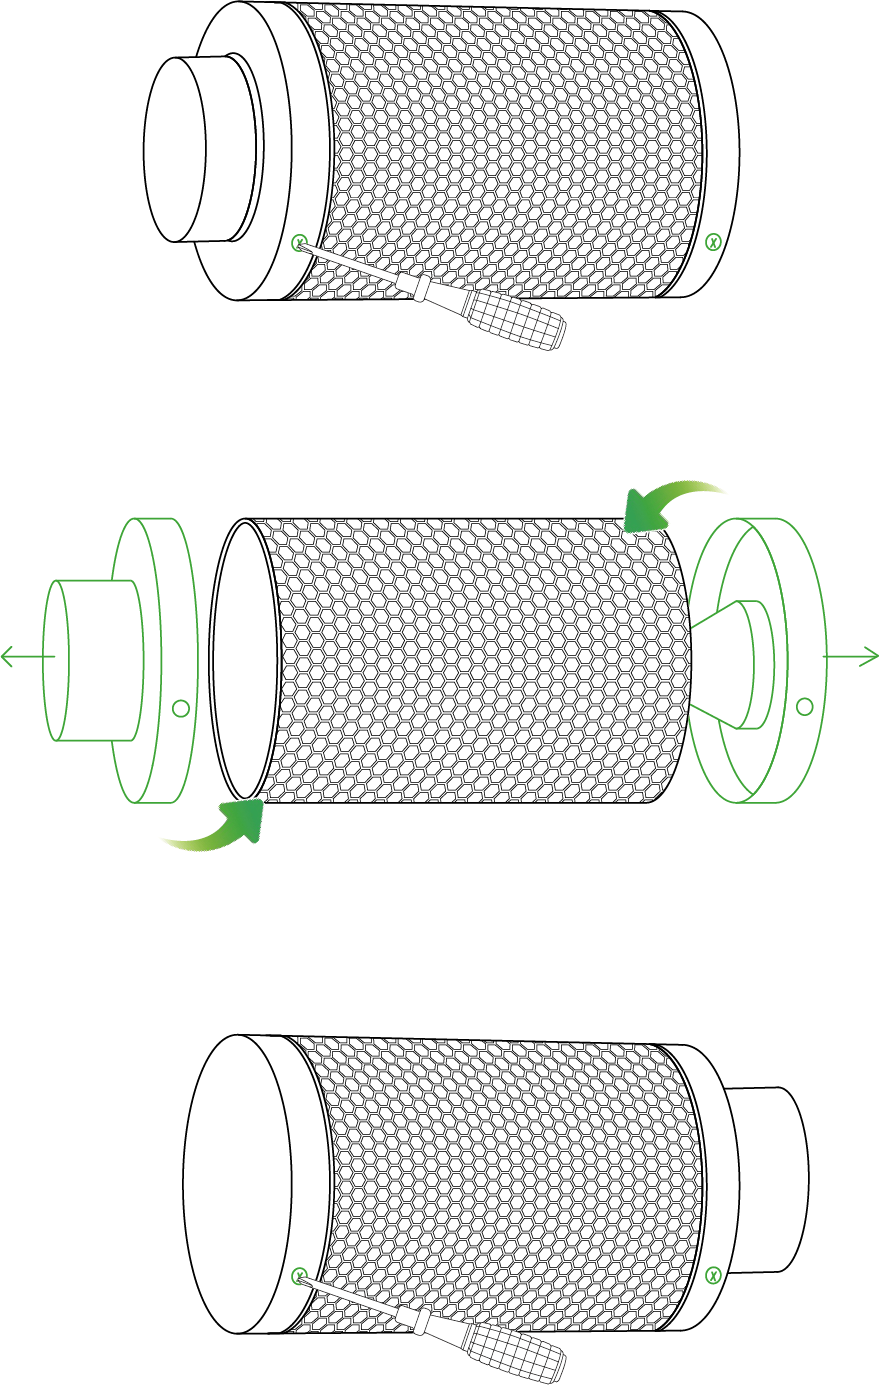
SWITCHING THE FLANGES
We suggest switching the flanges so that you utilize the entire carbon bed and extend its lifetime.Remove the screws from the flanges and disconnect them from the filter. Switch the flanges and screw them back onto the filter.
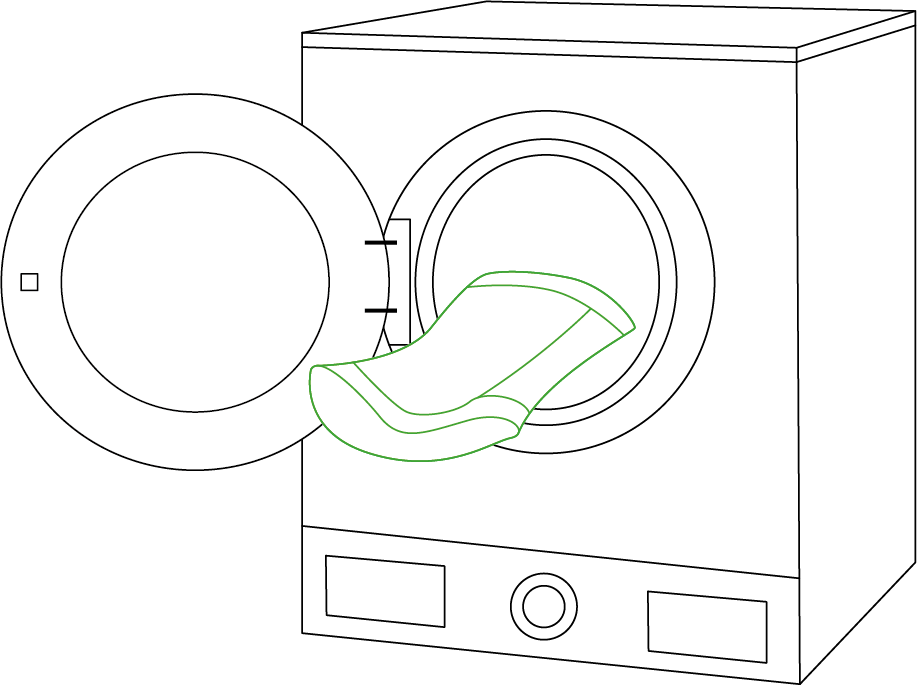
Use water to wash the reusable prefilter cloth regularly to remove the dust and extend the filter’s lifetime. Do not wash the carbon filter – if it gets wet it may ruin the carbon.
WARRANTY
VIVOSUN provides a 1-year warranty against defects on all Carbon Filter purchased directly from us or through our authorized dealers. This policy serves as our commitment to promptly address any manufacturing defects or premature breakage that may occur during normal use of our products.
Our warranty covers the replacement or refund of purchases that exhibit material defects within one years of the original purchase date. In such events, customers may contact us to initiate the claim process. We will need proof of purchase to verify coverage eligibility.
This policy does not extend to products that have been misused, abused, or purposefully damaged. It also does not cover normal wear and tear or cosmetic defects such as minor scratches.
Customers can rest assured knowing that our products undergo rigorous quality testing procedures. This 1-year warranty reflects our confidence in the durability of our products under normal use.
If any product defects are found, customers are encouraged to contact us immediately. Your satisfaction is our priority, and we are committed to resolving any issues in a professional and timely manner.
Contents

We help you grow your best green.

We provide the highest quality.

We relentlessly pursue the future.

We make growing more enjoyable.

We support every grower.
Sign up and get 10% off your first order
©2026 Vivosun All Rights Reserved